The plants we saved over the winter are still waiting in the basement.
Saving Coleus and RootingColeus and coral bells waiting for warmer weather.Starting annuals inside
While the new annuals take root inside, it’s still plenty cold outside in March and April. We even had our typical mid-April snowfall to remind us that winter wasn’t done yet.
Late snow in April
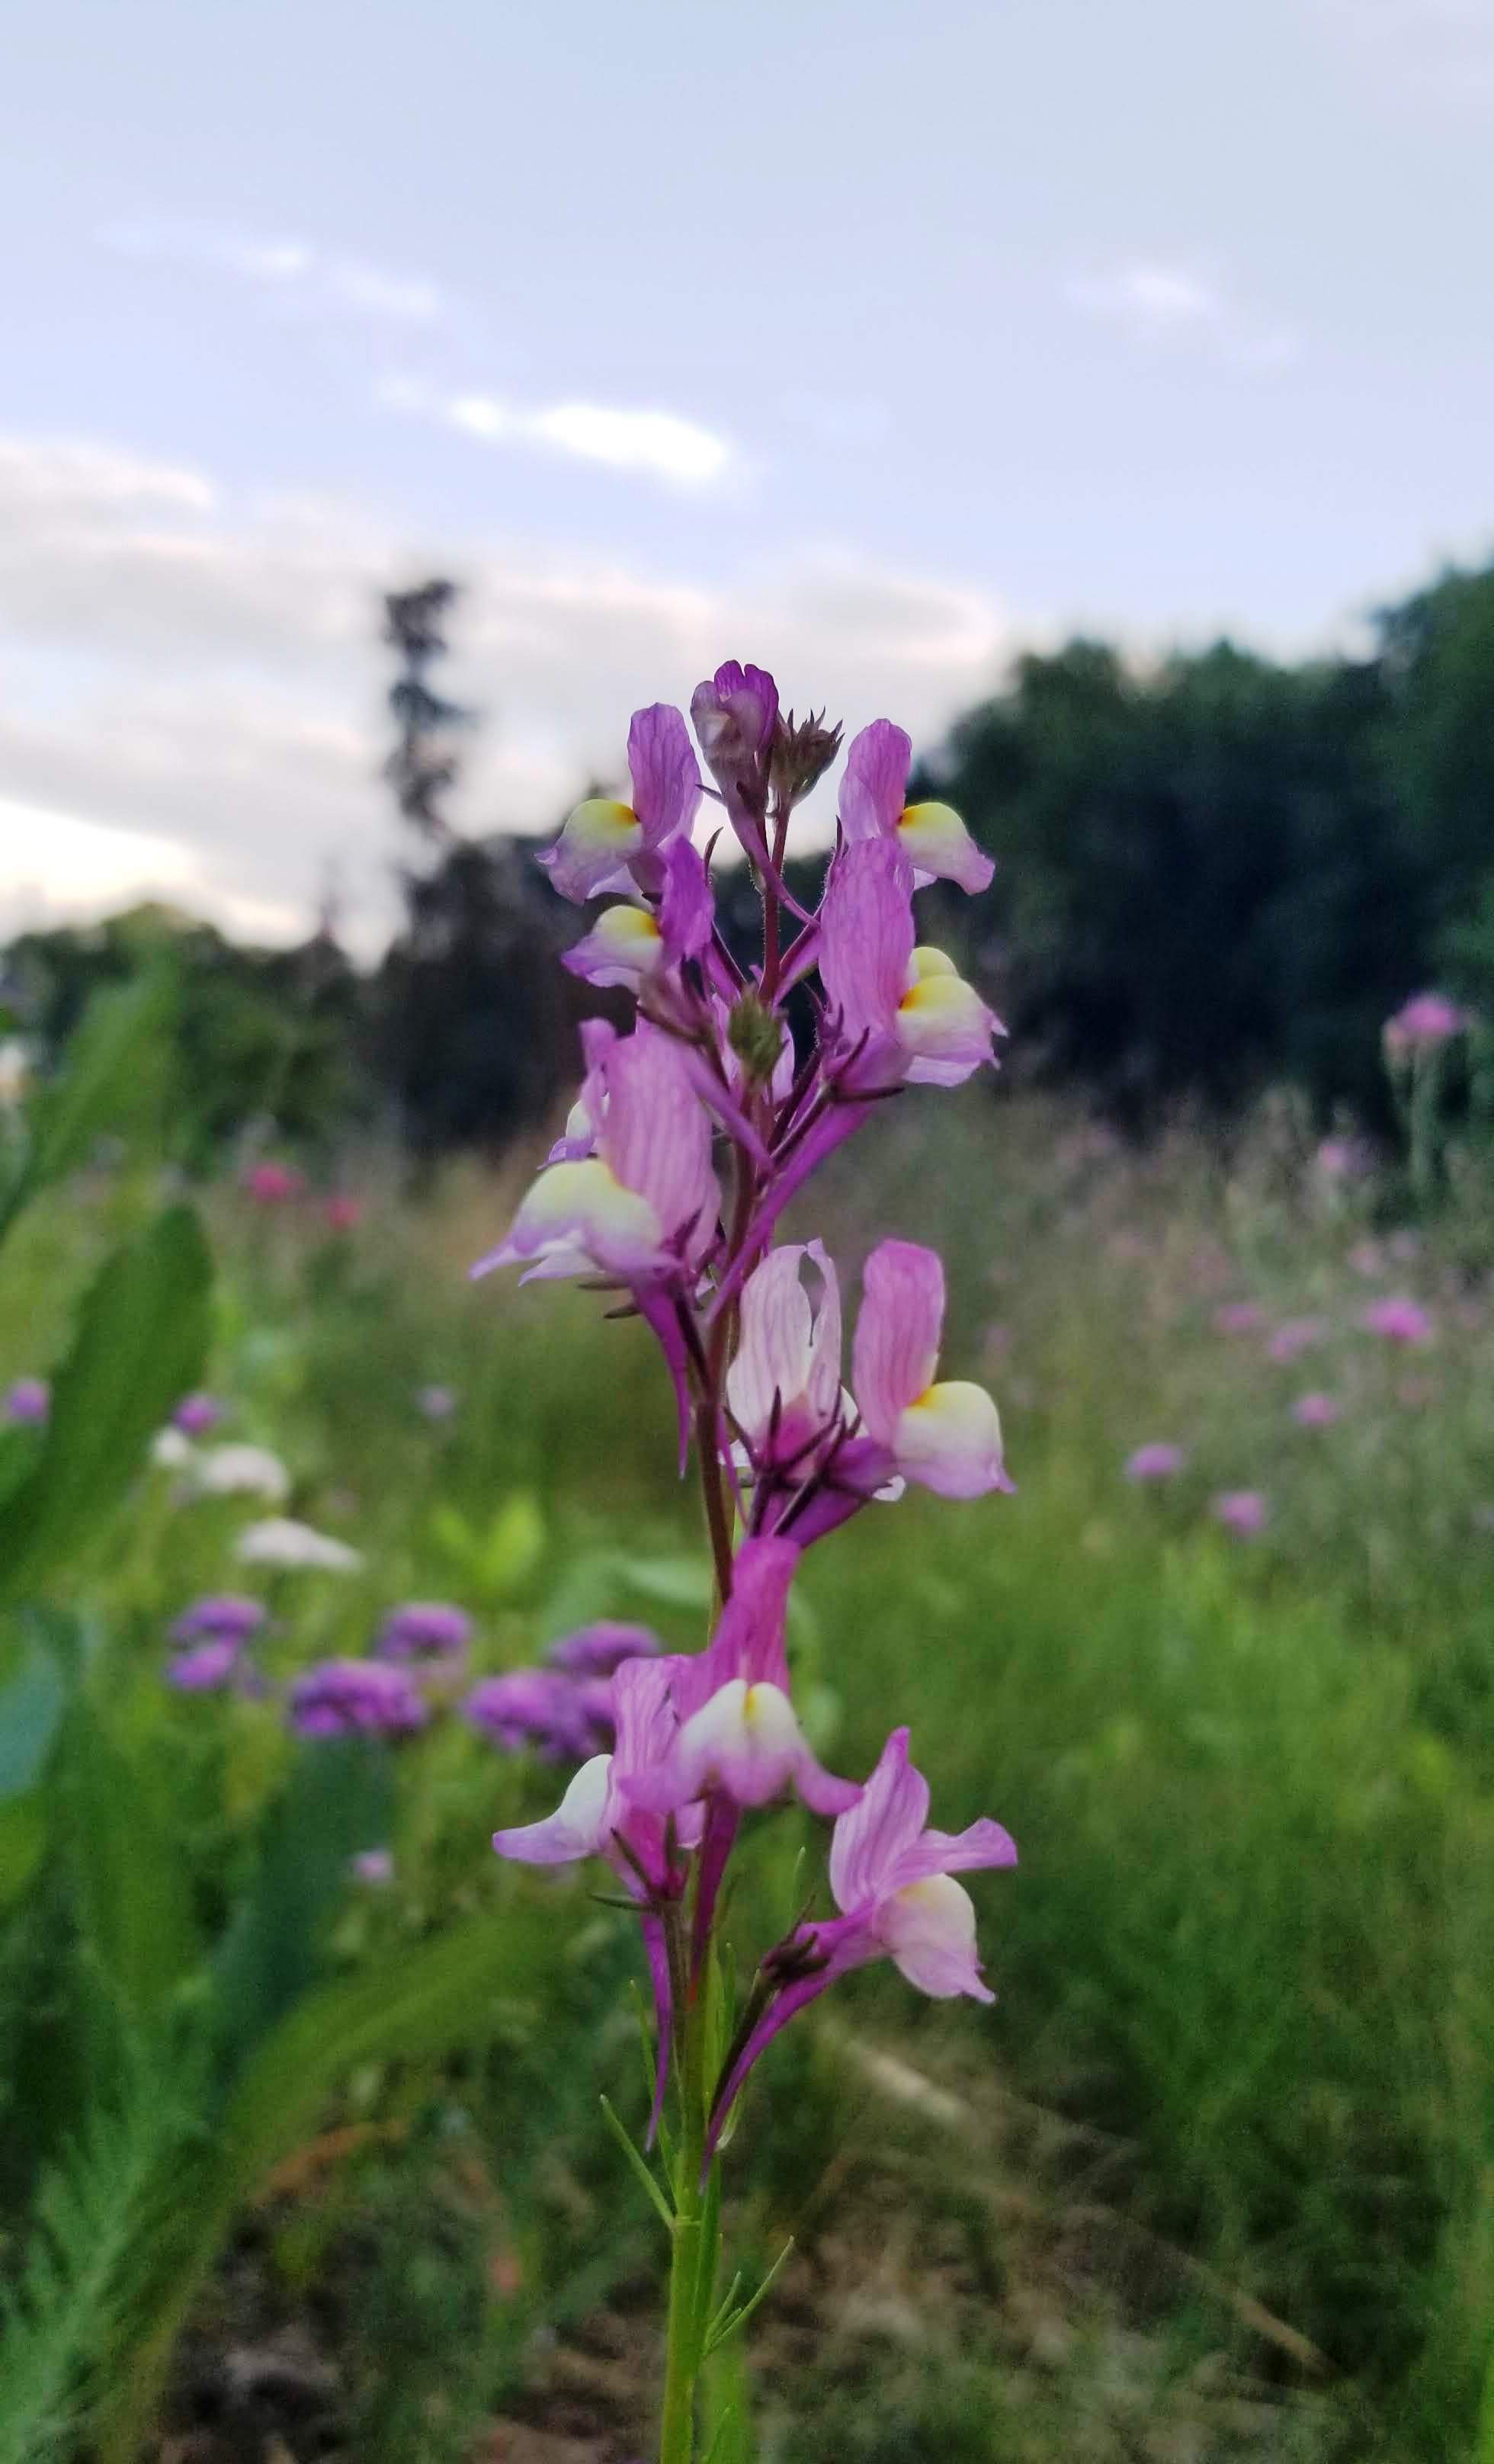
As you can see, we usually get fooled with an early spring, then a snow in mid-April. It’s very common for us to get frost any time through April, and even into early May. But, by mid May, we are really starting to see signs of blooms, like these phlox.
Soon we’ll be able to really head outside to plant the new annuals and really enjoy our spring weather. Can’t wait to see how all the plants do this year!
February 2019 brings us snow and excitement for indoor seedling sprouting.
Snow and leftovers from 2018
March 2019
Here we have from our local home store are annual flower seeds. We prepare to plant these for indoor sprouting to get them growing as soon as possible to be able to then transfer them outdoors. Most of the seeds we plant indoors are meant for our front flower beds and for pots. The majority of the wildflower seeds we plant from seed directly outside, although we have transplanted a few that were started early indoors.
Seed packets from local home store
It’s just so exciting to think about flowers in the dead of winter, when the outside temps are in the single digits (or negative). When the seed packets start showing up in the store, we always look to see if there’s a few new varieties we want to try out.
Indoor planting. All hands needed!
April 2019
As the snow finally cleared, it was time to start planning for this season’s flowers. First, we mowed down the remaining stalks that we left standing. We leave them standing in the fall for 2 main reasons: Seeds/cover for wild animals, and to easily see where the existing flowers are as we expand the plantings.
April 2019 Mowing last seasons growth. In preparation for 2019 seeds. First few signs of greenery after a frost.
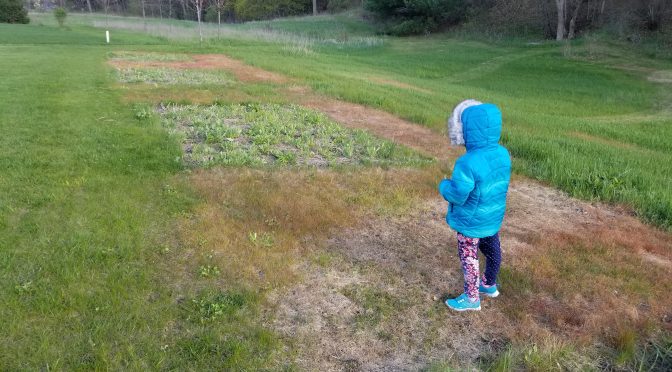
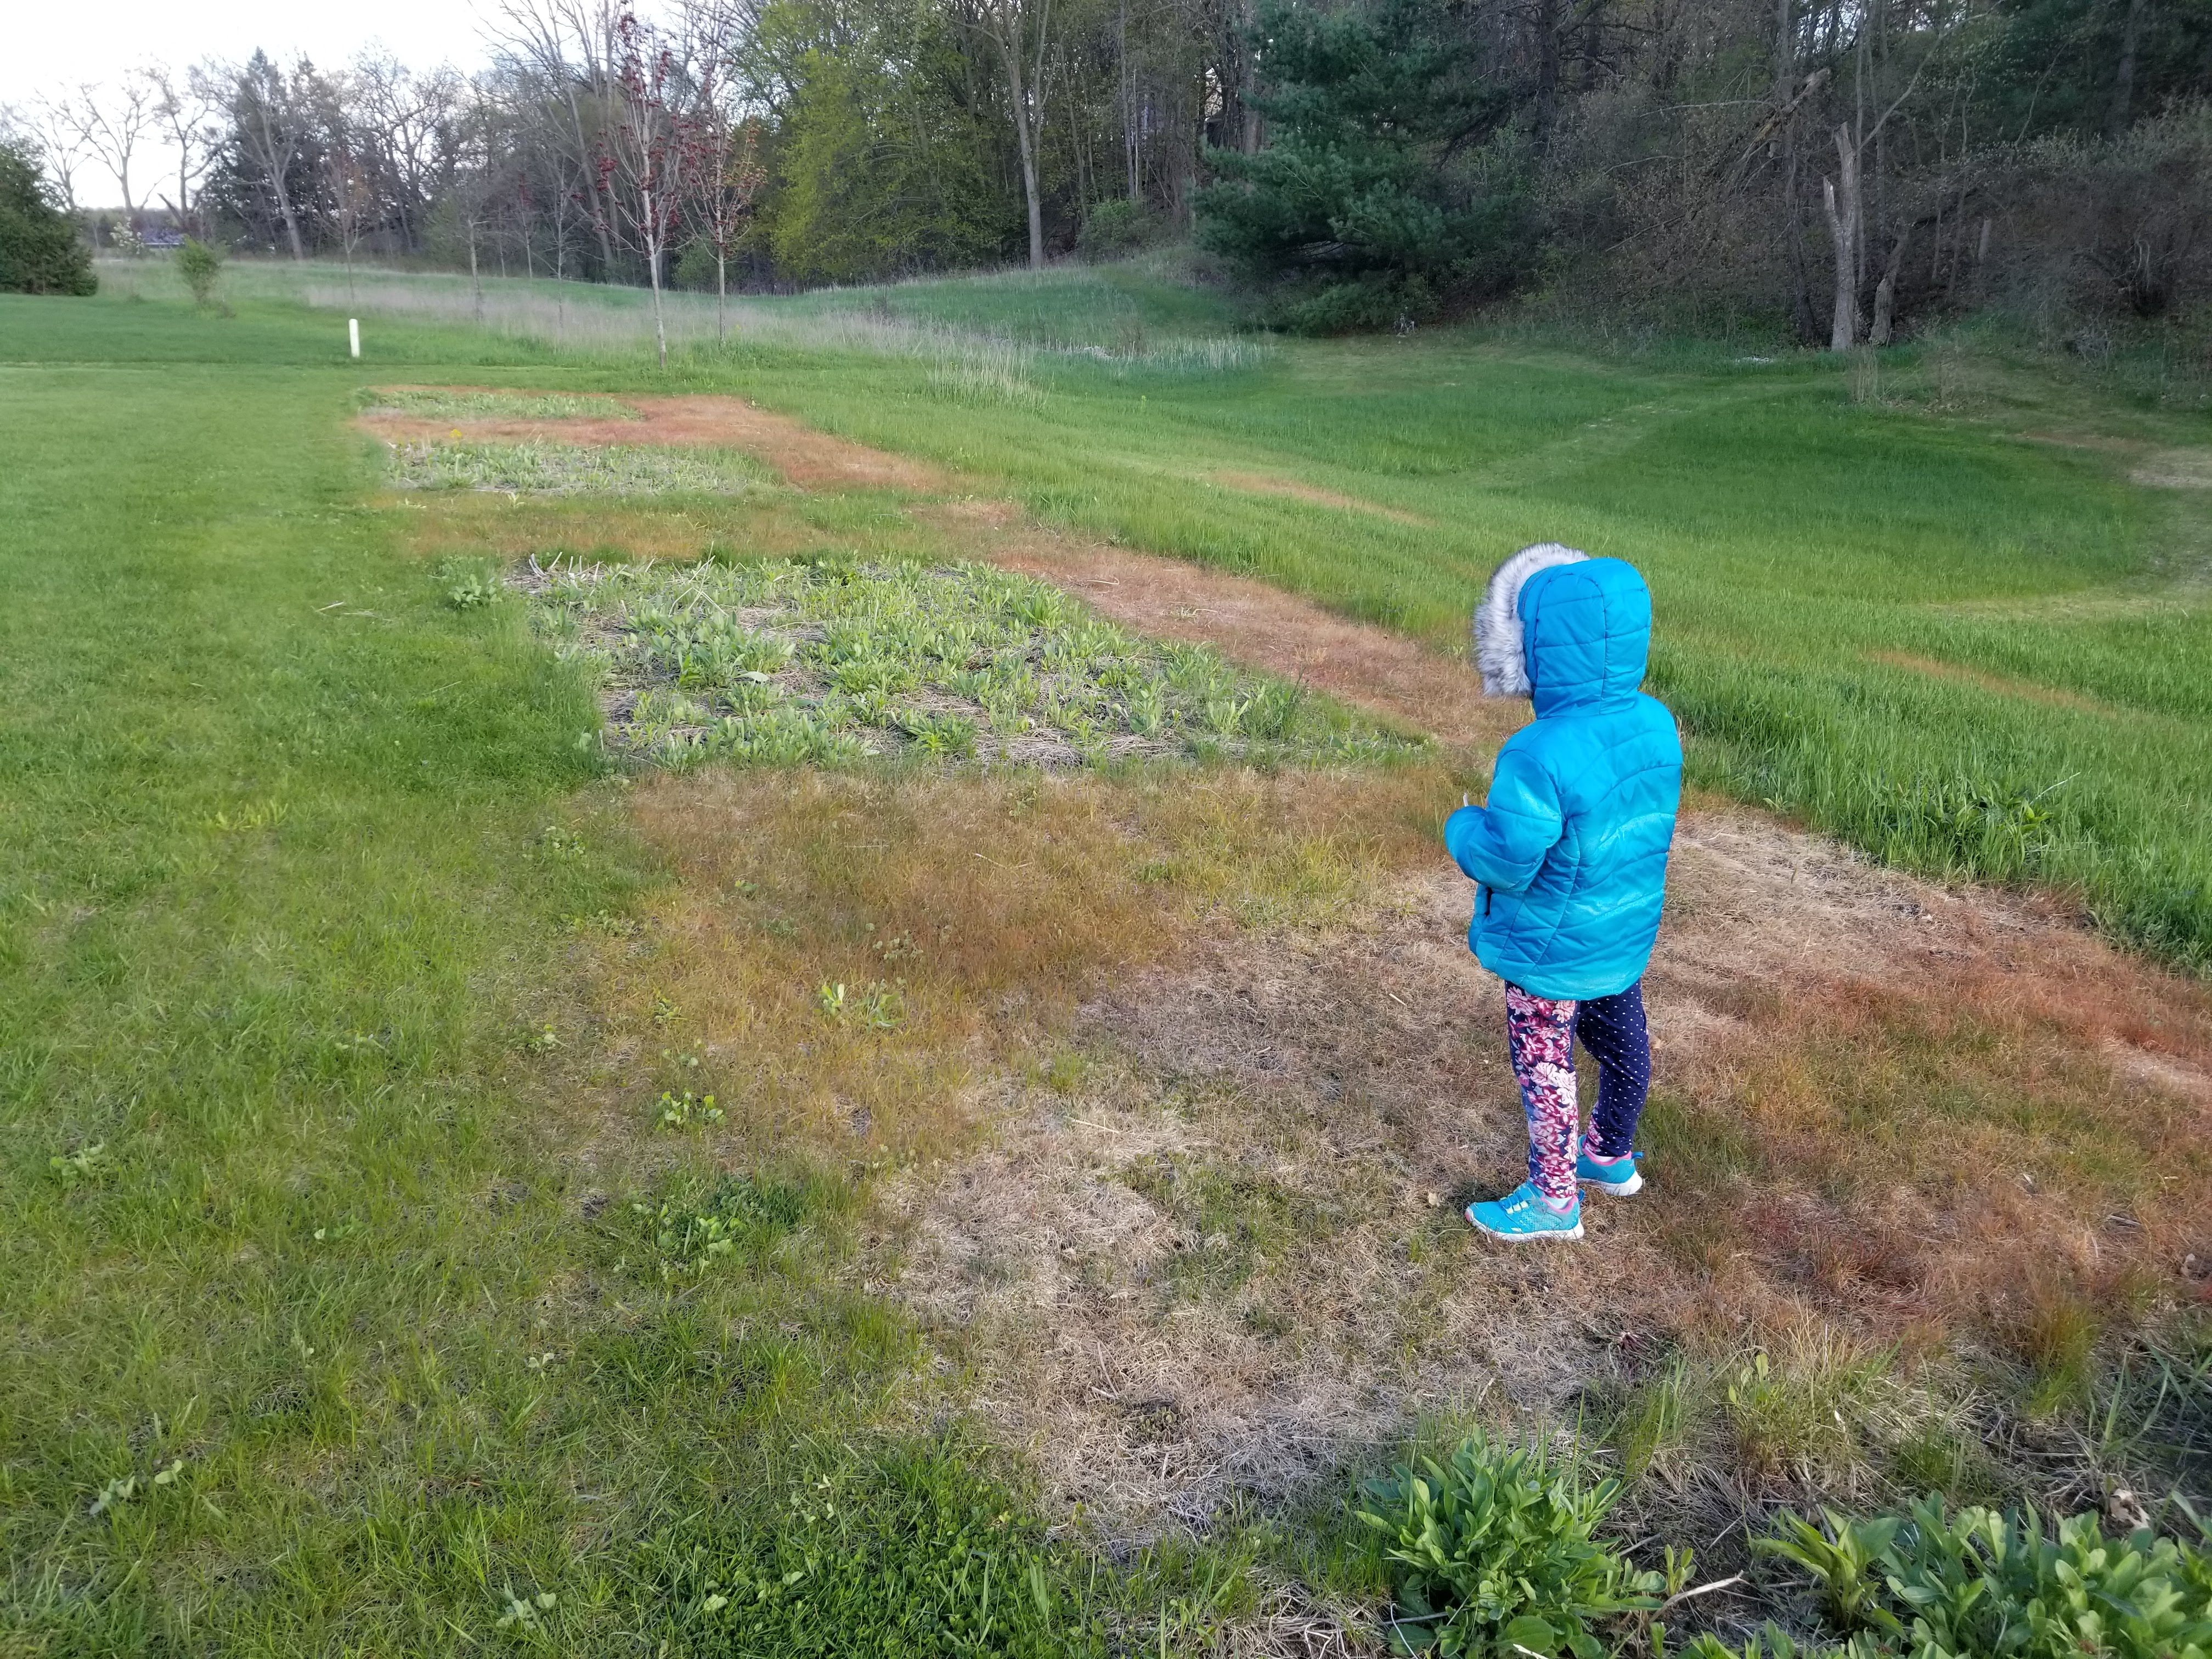
May 2019
Checking our progress so far! More greenery growing. We are waiting for the last frost before bringing out the green sprouts from our basement.
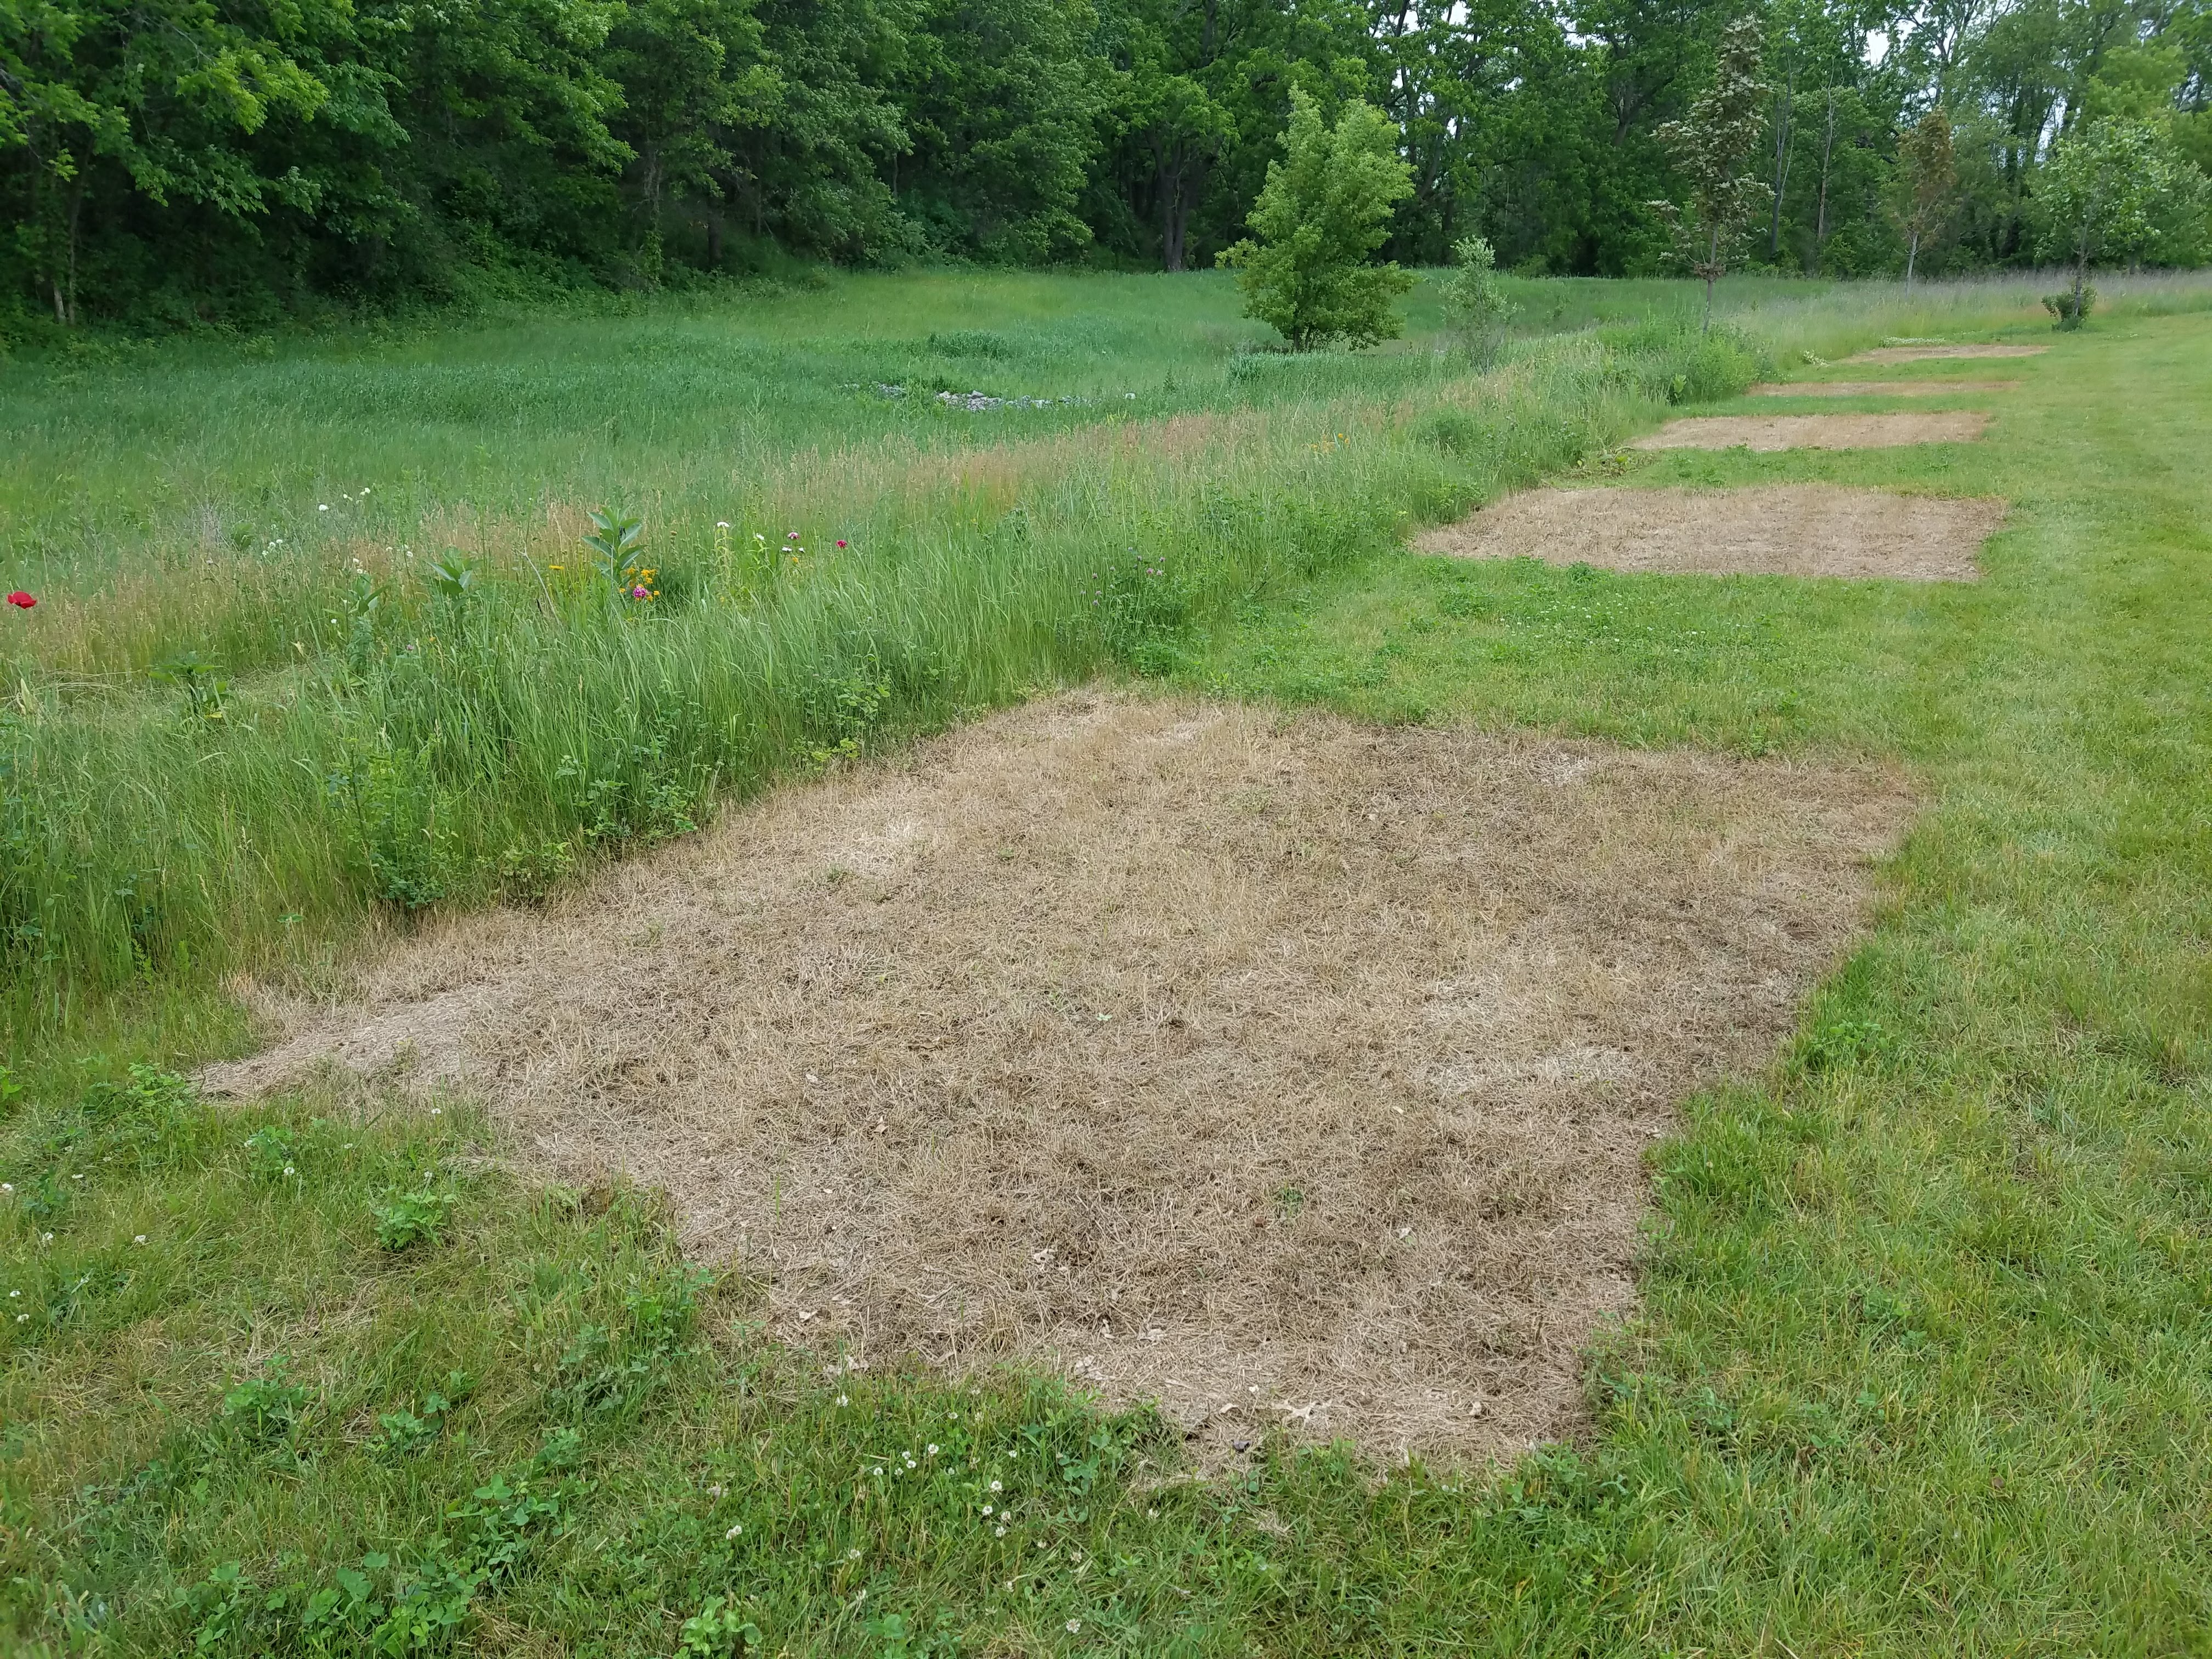
At the beginning of May, grass is already starting to grow. You can see the areas of existing wildflowers from 2018 in the green squares, and the areas of grass that were sprayed with Roundup / glyphosate to make room for new flowers in 2019. We planted seeds on May 19 this year for the expansion of the wildflowers.
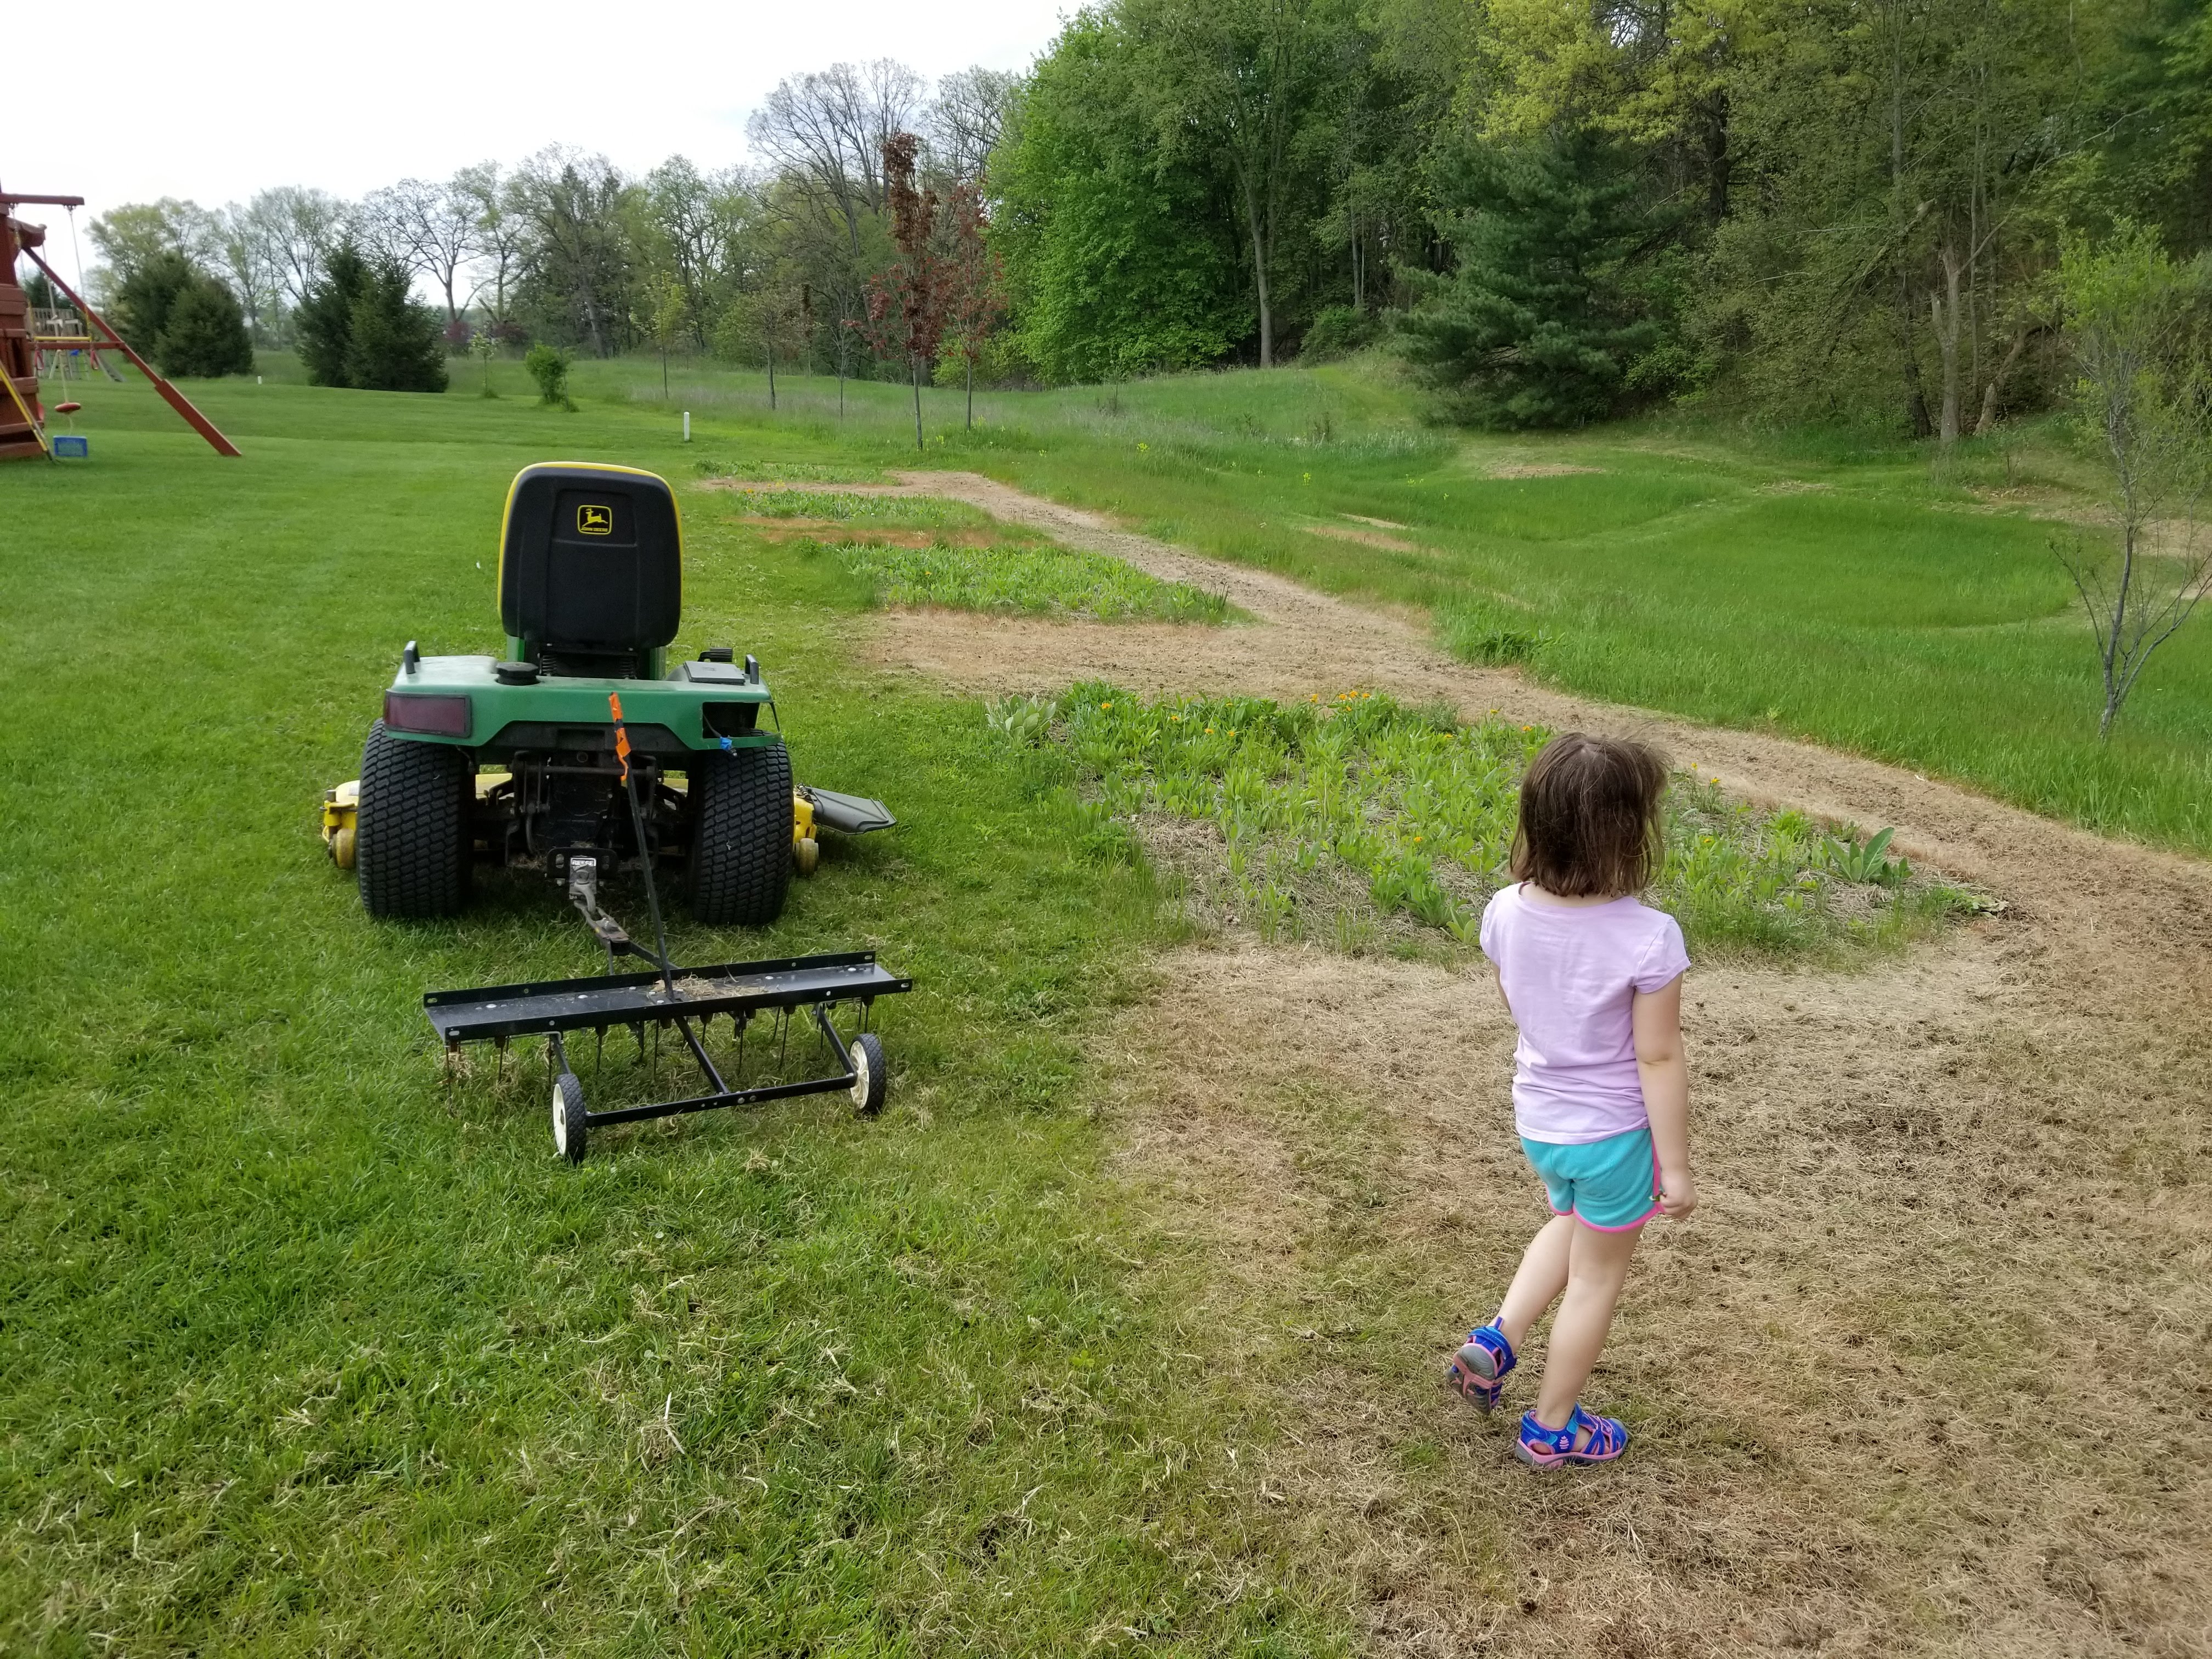
Preparing the soil and spreading seed mixture around the prepared areas.
This post will be very helpful for “How” we planted our wildflowers to get such a great stand of color. It’s not as difficult as some would have you believe.
Above you see my 2 secret helpers. A motivated child and a garden tractor with a dethatching rake. In 2018, I used a manual garden rake to scratch up the surface of the ares of killed grass. Since I was planting a larger area in 2019, I decided I wanted to try a larger tool, too. So I put my detatching rake behind my mower and made 3-5 passes over each new area to scratch the surface, allowing the possibility of soil to seed contact. Now, it’s time for some seeds
Seeds Harvested in 2018
The seeds harvested from 2018 were simply hand pulled/cut and placed into this paper grocery bag. I learned to store seeds in open paper bags early on to avoid mold/rot forming before the seeds have a chance to dry. These seeds just stayed in my unheated garage in this bag through winter. They dried effectively in the cold, dry air. Now it’s time to separate the seeds from the heads. If you’re saving your own seeds, you don’t have to be fancy here. I find that rubbing them over a wire mesh does a decent job of separating. No need to try to winnow the seeds or really clean them up. All of the petals and chaff are just going to be re-broadcast onto the ground when seeding. Plus, it’s really hard to see where the seeds go if you only have pure seed. I add sand and/or sawdust to my seeds to make it easy to see where I have already planted.
Seeds after initial threshing
Seeds will start to look like this after the initial threshing. I continue to manually work the large seedheads until there are only small pieces that easily pass through the mesh. You might notice that this is a HUGE quantity of seeds compared to what you might buy in a seed packet. Saving your own seeds can be very cost effective.
Once the seeds are mostly separated, I mix with sand and sawdust to make it easy to broadcast. I find it is simplest to just throw this seed mixture by hand, although I have tried other broadcast spreaders, too.
Spreading the seed
After spreading the seed, there is one VERY IMPORTANT step you should not skip. Press the seed into the ground to ensure soil to seed contact! Most of these seeds do not need to be buried, but many require sunlight to germinate. However, they all require soil contact. There are many ways to do this, but I chose to continually drive over the area with my lawn mower. The large turf tires do a great job of pushing the seeds down to the soil. Other methods would be a roller, boards, or similar way to compress the seed down. DON’T SKIP THIS STEP!
Well, I did it! I sold at my first Mom to Mom Sale this weekend. Apparently most who don’t live in Michigan may not know what a Mom to Mom Sale -often referred M2M- sales take place at churches, schools, or a few expo centers, table renters stack kids clothes sky high, with an occasional clothes rack here and there, sprinkled in with toys or other baby items they have collected through the years with kids. The sales are usually advertised throughout the community and also on the Mom to Mom sales for Michigan website. Often there is a door fee of $1 or $2 for buyers to come in and shop the tables, each seller prices their own items however much they want. (The biggest complaint I’ve heard from friends and fellow shoppers, most are overpriced!) Every now and then there are GOOD deals to be found, but similar to a garage sale it can be a hunt. The nice thing about M2M sales is you know there will be a ton of kid clothes and baby supplies if you’re a new mom, an expecting family member such as a Grandma -as my mom would say, “A lucky new Grandma!!”, or a close friend is having a baby.
Today, my day came…we were trying to decide if we were going to have another baby and if we did would it be another girl. I held onto EVERYTHING for the past 5 years waiting for this decision! So, I started my research and heard from friends they had some good success selling and buying at M2M sales and I began pulling totes upon totes from the attic. Calling my mom asking her to come help because I had no idea where to even begin really. This is how we started to separate and divide up all the clothes from my one little girl:
Closet full. Preparing for sale.
The sale that I was going into was labeled as Spring/Summer clothes. That helped a lot for a first timer to be able to focus on just one season. We piled in totes each size of warm weather clothes from birth to 6x!!! I had a small pile of very sentimental clothes that I just couldn’t part with yet. Then we took each size, one at a time, to verify the quality, any stains rips, or marks to make sure that we weren’t trying to make money off of junk. Once looked-over we began to make coordinating outfits within that size pile. This was a fun part!
Onto pricing…well that was a bit more difficult but so necessary and the whole reason for doing this work. After talking with friends who have done this, reading blogs with tips for good M2M sales, and my own sense of what I feel would be a good deal to move the clothes. Once we came up with a plan to group into 3 different categories, “Good, better, best” we then came up with a sticker system, 3 different colors and a specialty tag for higher items. I was worried that my stuff wouldn’t move, even though in GREAT condition. I just wanted to sell and get it out of my life. So I went with the highest everyday items at $3 and anything that was specialty was up at $6. Such as her first Daddy-Daughter dance dress! My mom on the other hand wanted to see higher prices on our stuff. I was very apprehensive just because I didn’t want to negotiate too much and I wanted my stuff to move, move, move.
Once pricing was over, I knew I wanted to be different and have my clothes all on a rack. I’ve never seen this done before at a M2M and most say that a rack is best but is not used often. A stack of pants on a table is the most common, yet most complained about. Or a bin marked “pajamas” to stand and dig through is another complaint. Knowing this, I asked my husband (who builds everything and anything) if he could think of a way to make a rack for 5 years worth of summer clothes from our peanut. This is what he created!!
The rack, the rack, the rack, was beautiful – well, you know, not looks wise, but functionality wise was stunning! I received so many compliments on it, how easy it was to see everything, and no one had to do any folding and refolding and refolding. (I will post a picture of just the empty rack and a link for instructions on the build here)
This is the rack when it was full at the start of the sale. Plus we had an eye catching dress rack in front. We started the sale with 14 dresses on it and at the end there were 6 left.
We had each size separated with dividers marking the start and end of the group. I had heard bigger sizes go the fastest, which I was surprised by. I figured the cute, beautiful baby clothes women swoon over would go fast…nope! Seeing it first hand I was so wrong.
In my research I found a suggestion of how much change to start with in your pocket at the beginning of the sale, I went with $170 broken up into 50 1’s, 10 5’s, 5 10’s and 2 rolls of quarters ($20). I didn’t have any issues with change during the sale. My mom and I split it up between us so that buyers could go to either one of us to get their transaction done. It was smooth! We each wore an apron for fast cash and I wore a purse around to put my larger bills in so not to have too much loose in my pockets. My mom made her apron in 10 minutes and I used one I had from selling furniture and fun knick knacks at Peir1 during my college years.
It was nice to be able to work with my mom on this daunting task we had major laughs with each other, like being table number 1, chanting, “We’re number 1, we’re number 1!!” Me, semi-failing at group-work since being out of school for a while now freaking out that Mom was going to forget something super import for the project, like the PRICING GUIDE!
Advertising!
All in all I had a great first sale. I loved doing the research before hand and seeing all the stuff hung up and being way more organized than most in all of this. When I asked a friend for advice of how to do this she replied, ” Being organized, which I’m sure you are, is KEY”. I found out from talking to veteran sellers toys go fast, larger sizes fly off the tables – or racks! Buyers explained what is important to them when going to a M2M sale: (good quality) boy clothes are hard to come by, hanging clothes are best, shoes are a great deal, and clear prices are crucial.
In total I was at the sale for 5 hours the morning of, 2 hours the night before setting up my rack, and approximately 20 hours of prep/sorting/pricing time (not including my mom’s time or my husband building the rack). I sold about half of my summer clothes at this sale. Later finding out that the sale was not well advertised locally and community members were shocked when I posted it on a neighborhood Facebook page not knowing that it was happening without any type of sign. Apparently there are usually more buyers coming through this sale than there were today. I’m looking forward to the winter sale now that I have an idea of the flow of it all. I will be improving my price stickers and will update the post on how I do that. You can follow this link for the winter sale update.
I’ve done some thinking about how to improve the price tags. I was able to go to my local library where they have a die cutting machine available for patrons to use if they bring their own paper. Sure enough they had a die specifically for gift tags which had 3 separate tags for each punch.
Die cutting machine at the library.Gift tags.
I was then able to string on and tape to each outfit. I used tape so that I’m able to remove them to use for future Mom to Mom sales.
Gift tag taped on outfit for fast removal to reuse at future M2M sales.
We like to keep as many of our annuals as we can from year to year, and one of the easiest plants to propagate is the coleus. Each fall we take some clippings of our favorites and use them to brighten up the kitchen sink windowsill while they take root, preparing them for next year. These were brought inside early October 2018. If you look, you might be able to see the leaves changing color in the background.
Saving Coleus and Rooting
I always love these early autumn days, as the leaves are changing but the days are still sunny and warm. It’s one of my favorite times of the year.
Early Fall Colors from the Sugar Maples
Later in the winter, you can see we’ve moved some of the coleus into the basement seed starting area, nursing them along until warmer weather comes in May.
Coleus and coral bells waiting for warmer weather.
If you haven’t seen how I got started creating my wildflower meadow, be sure to look for posts 1and 2 from 2018.
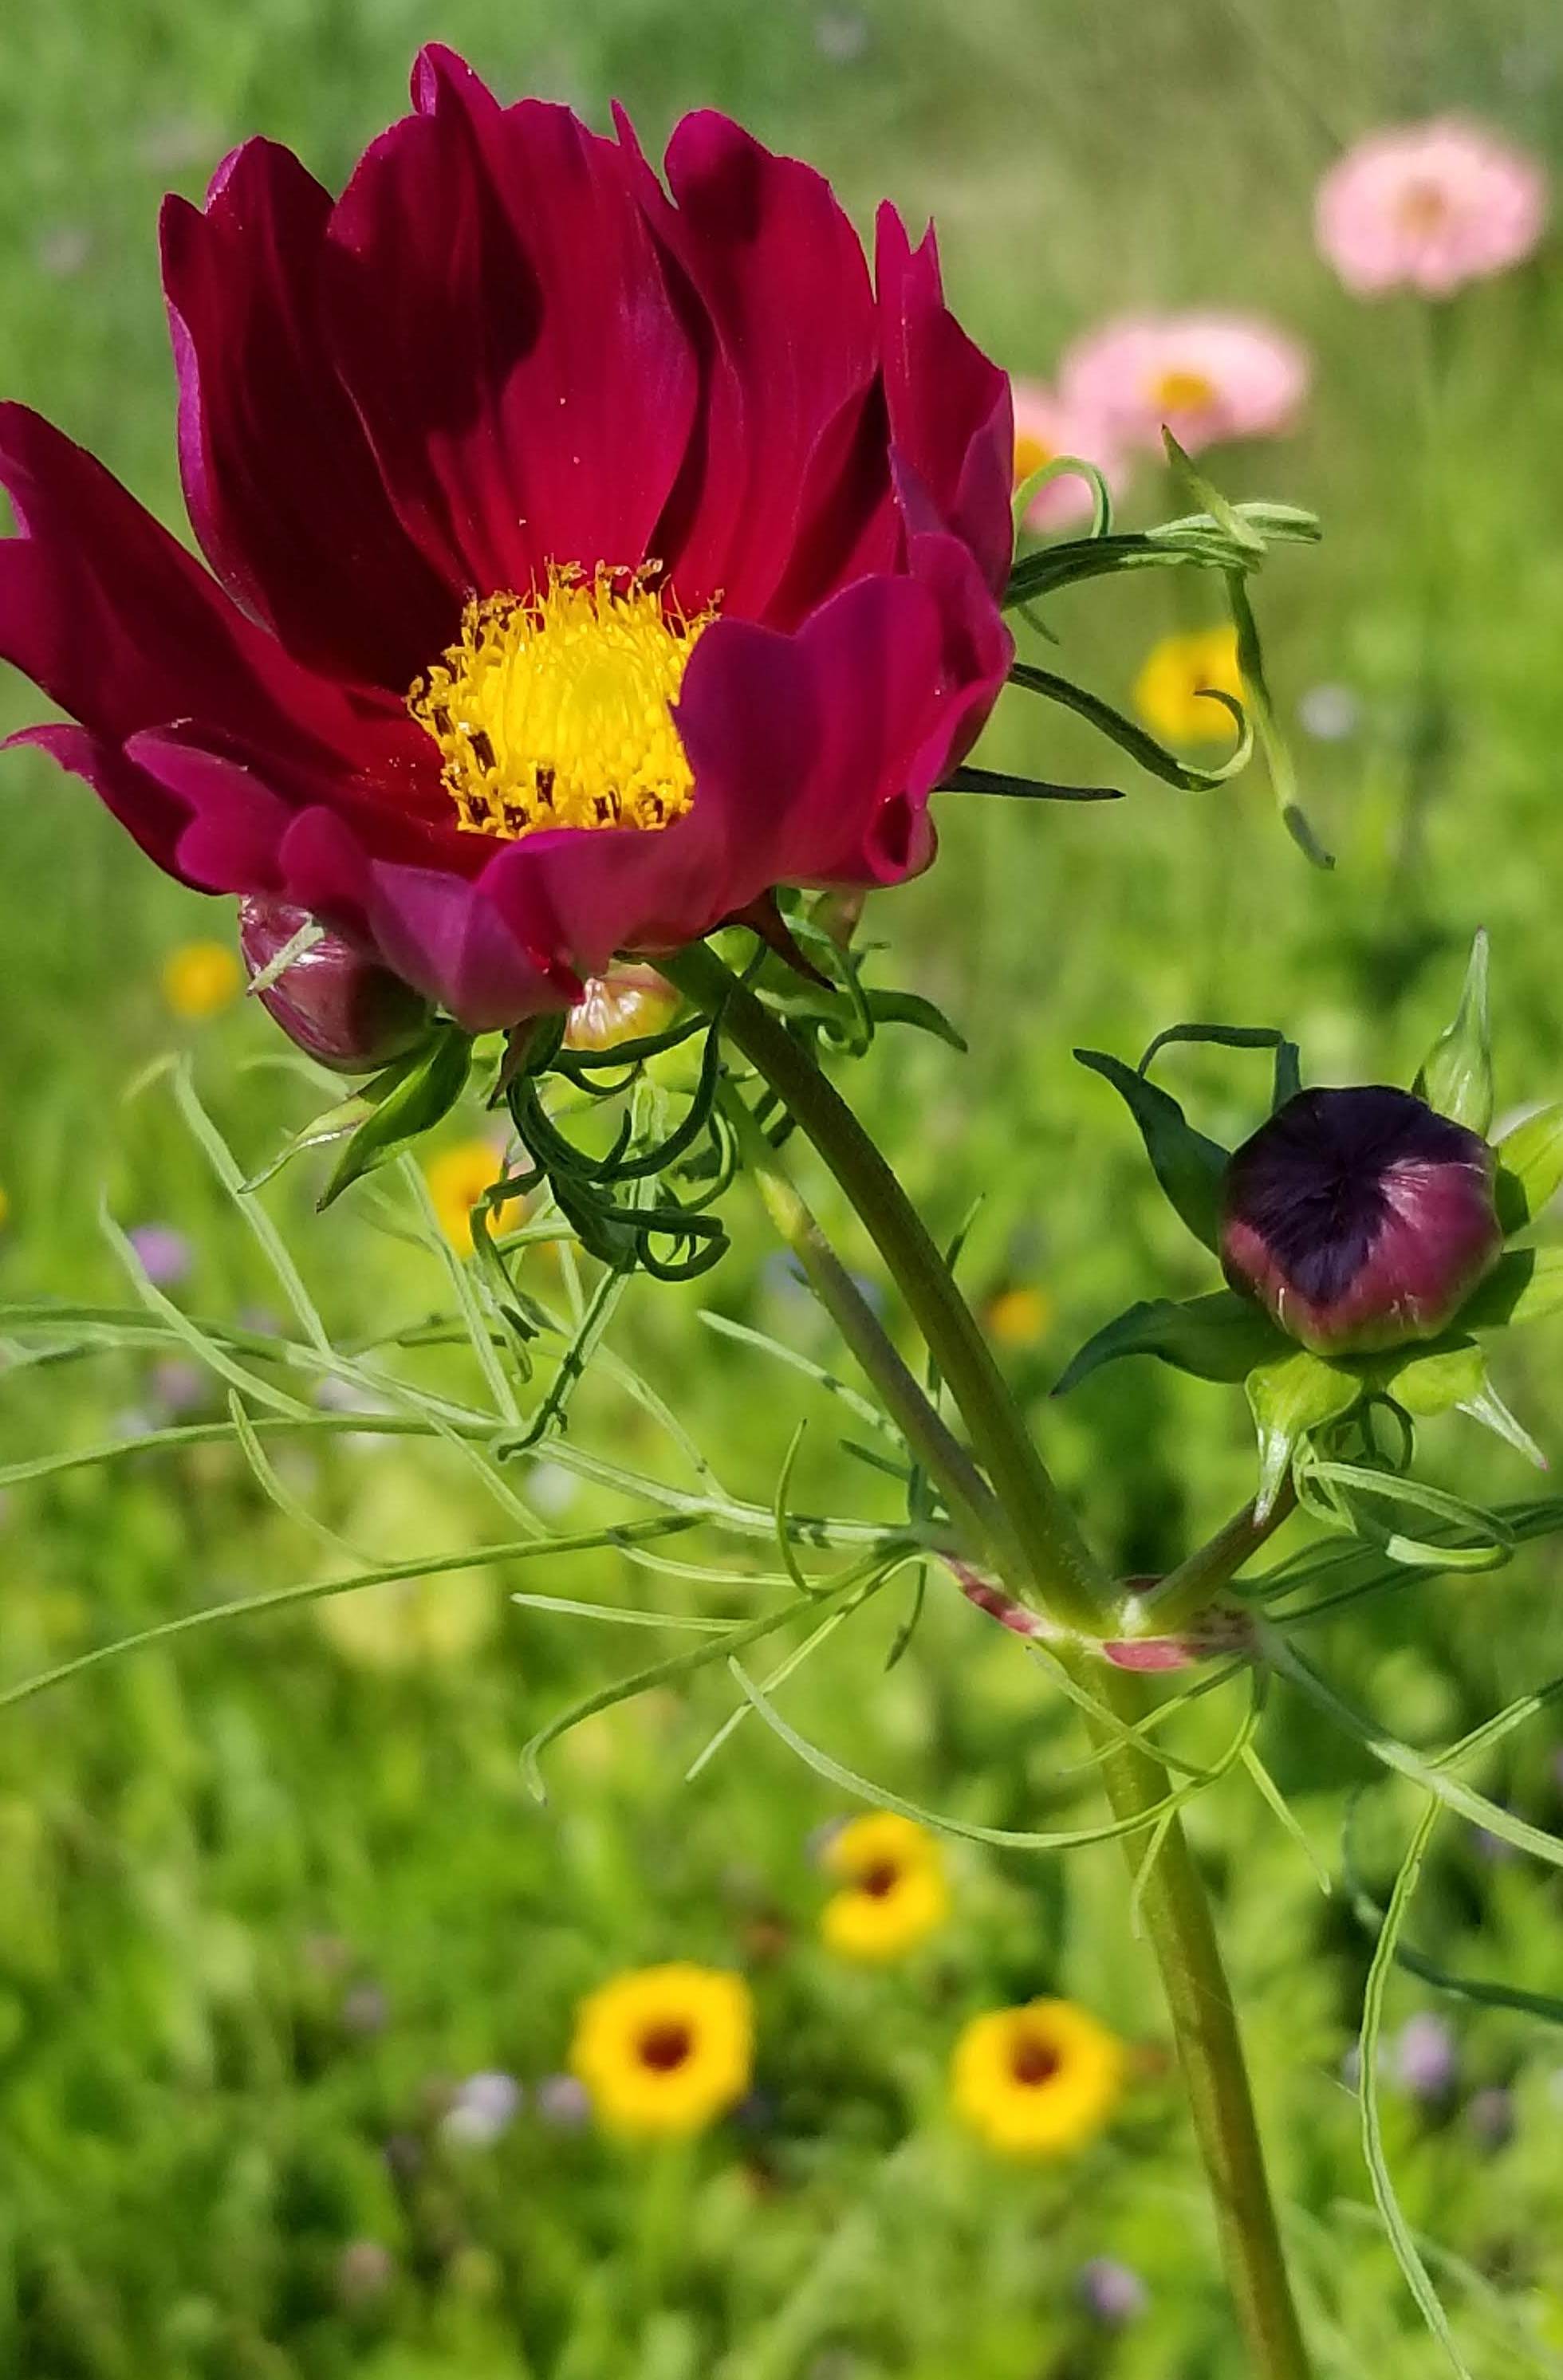
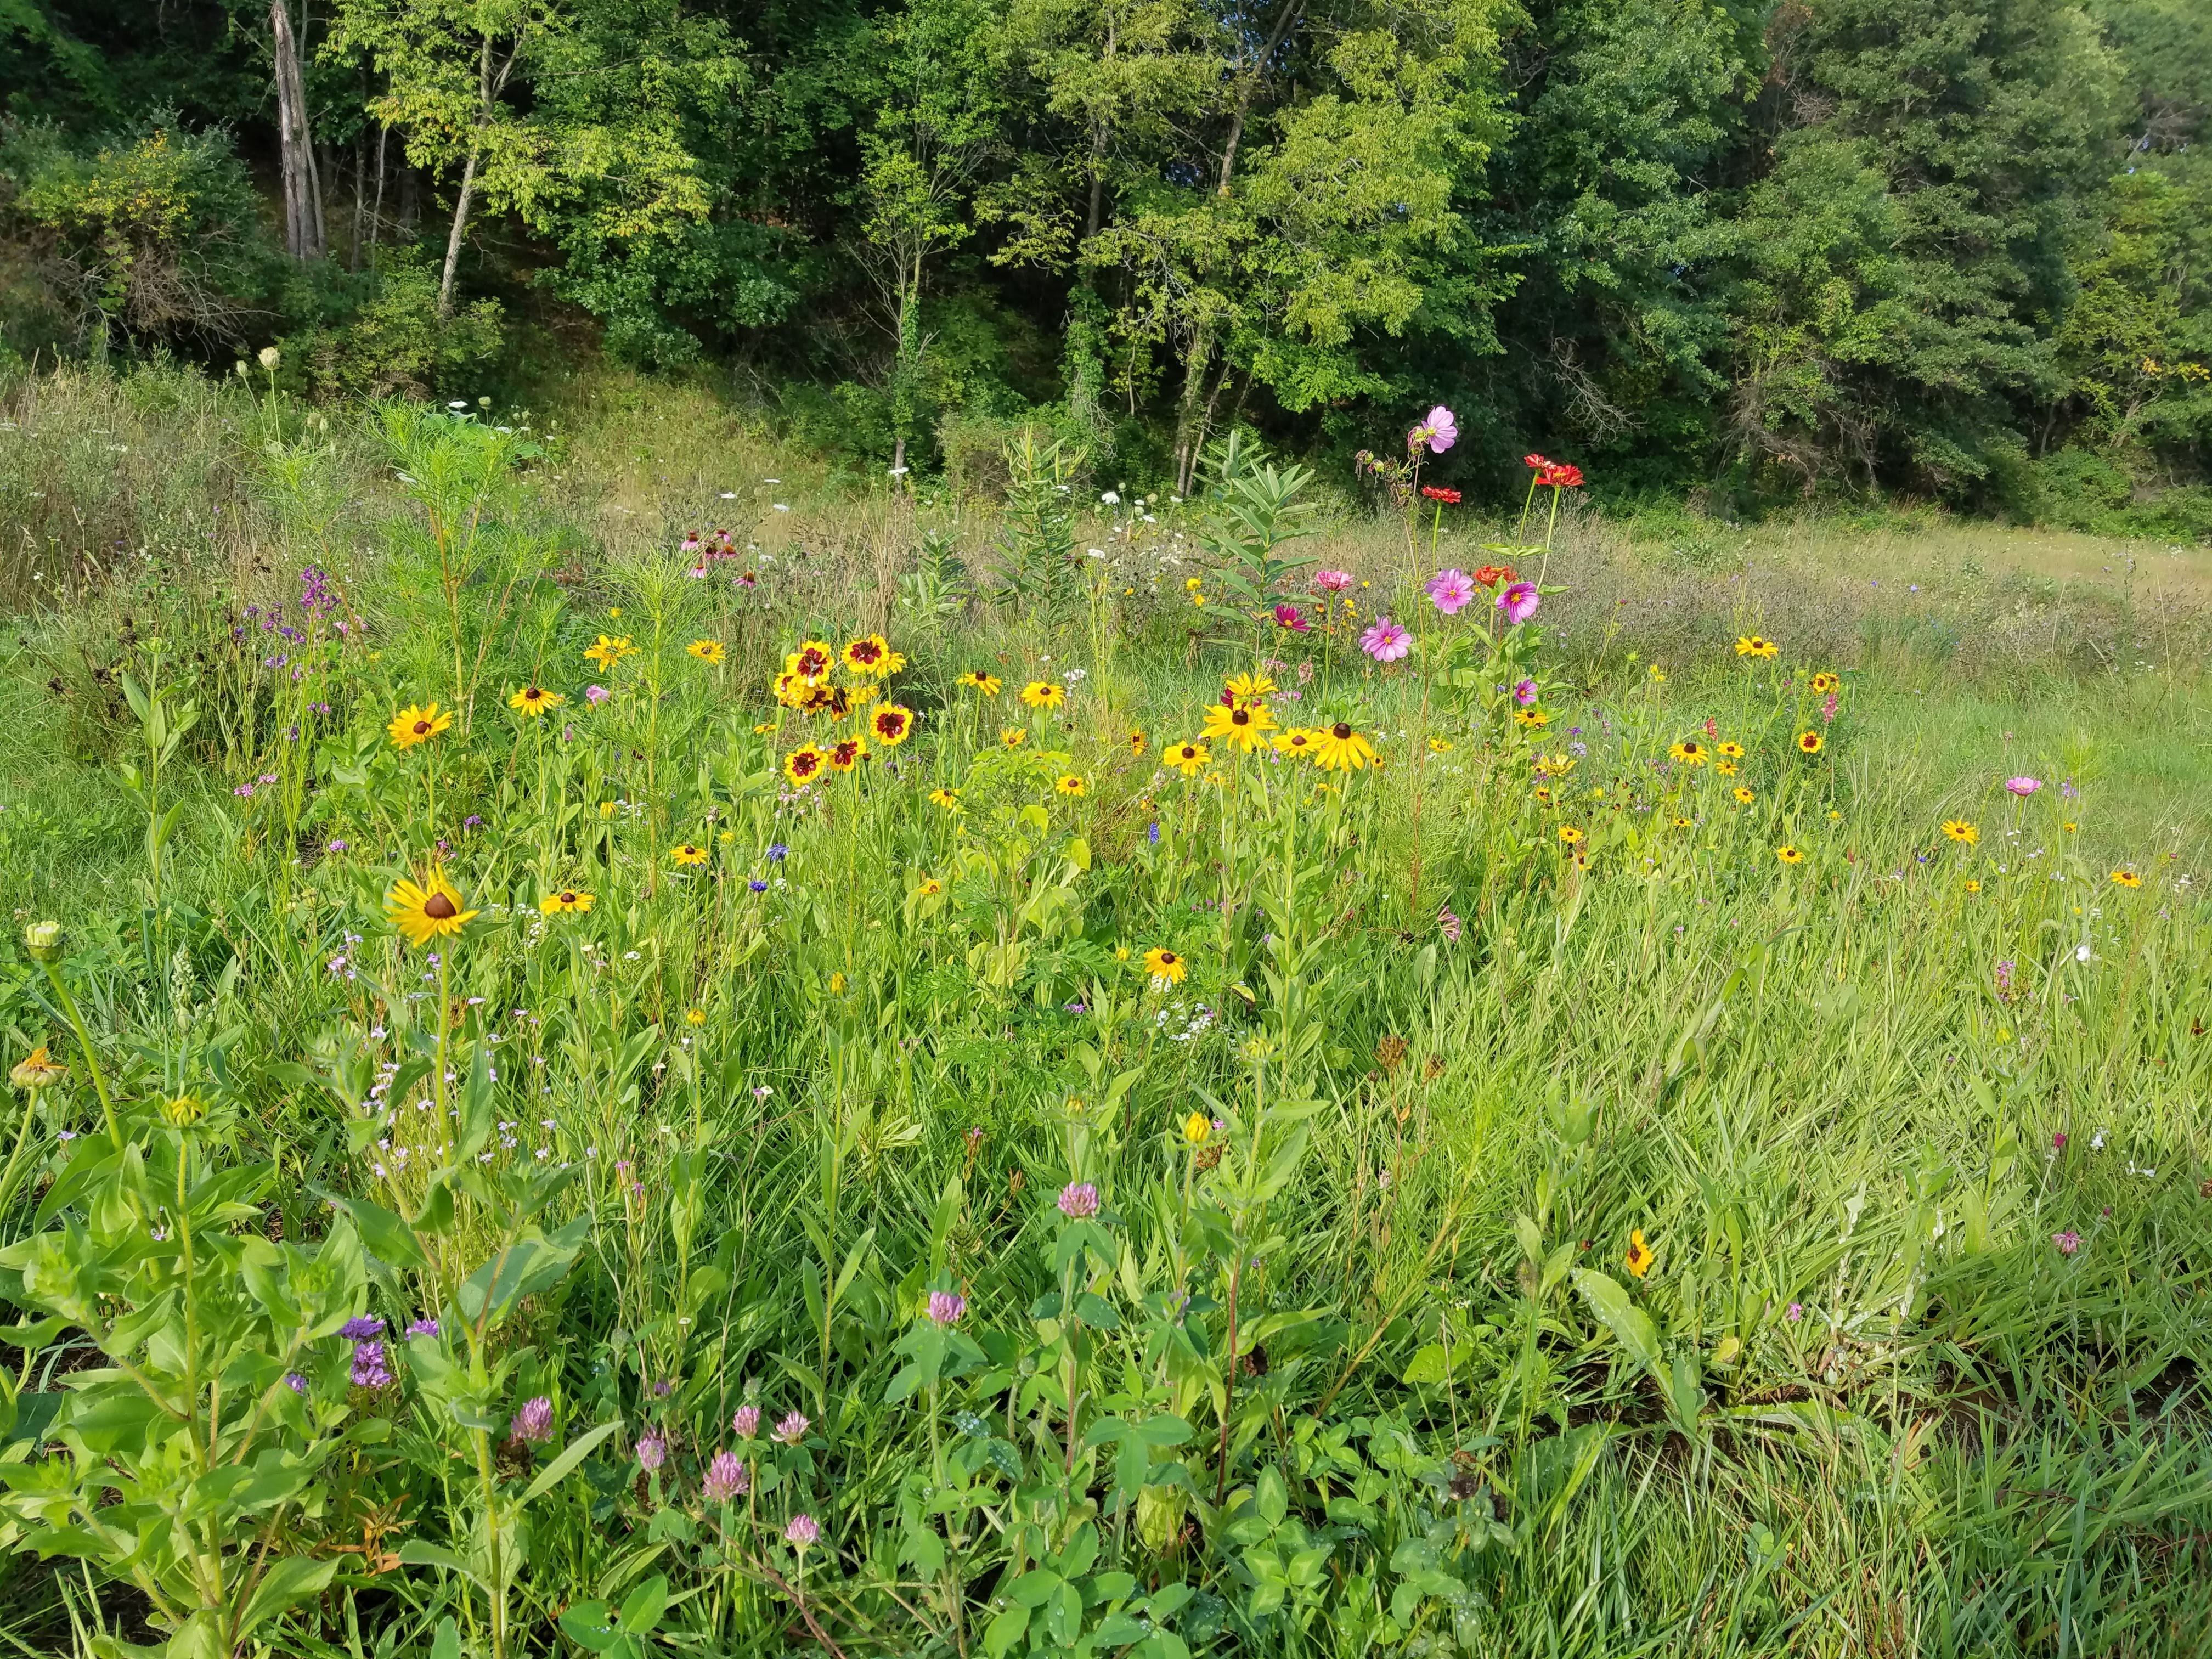
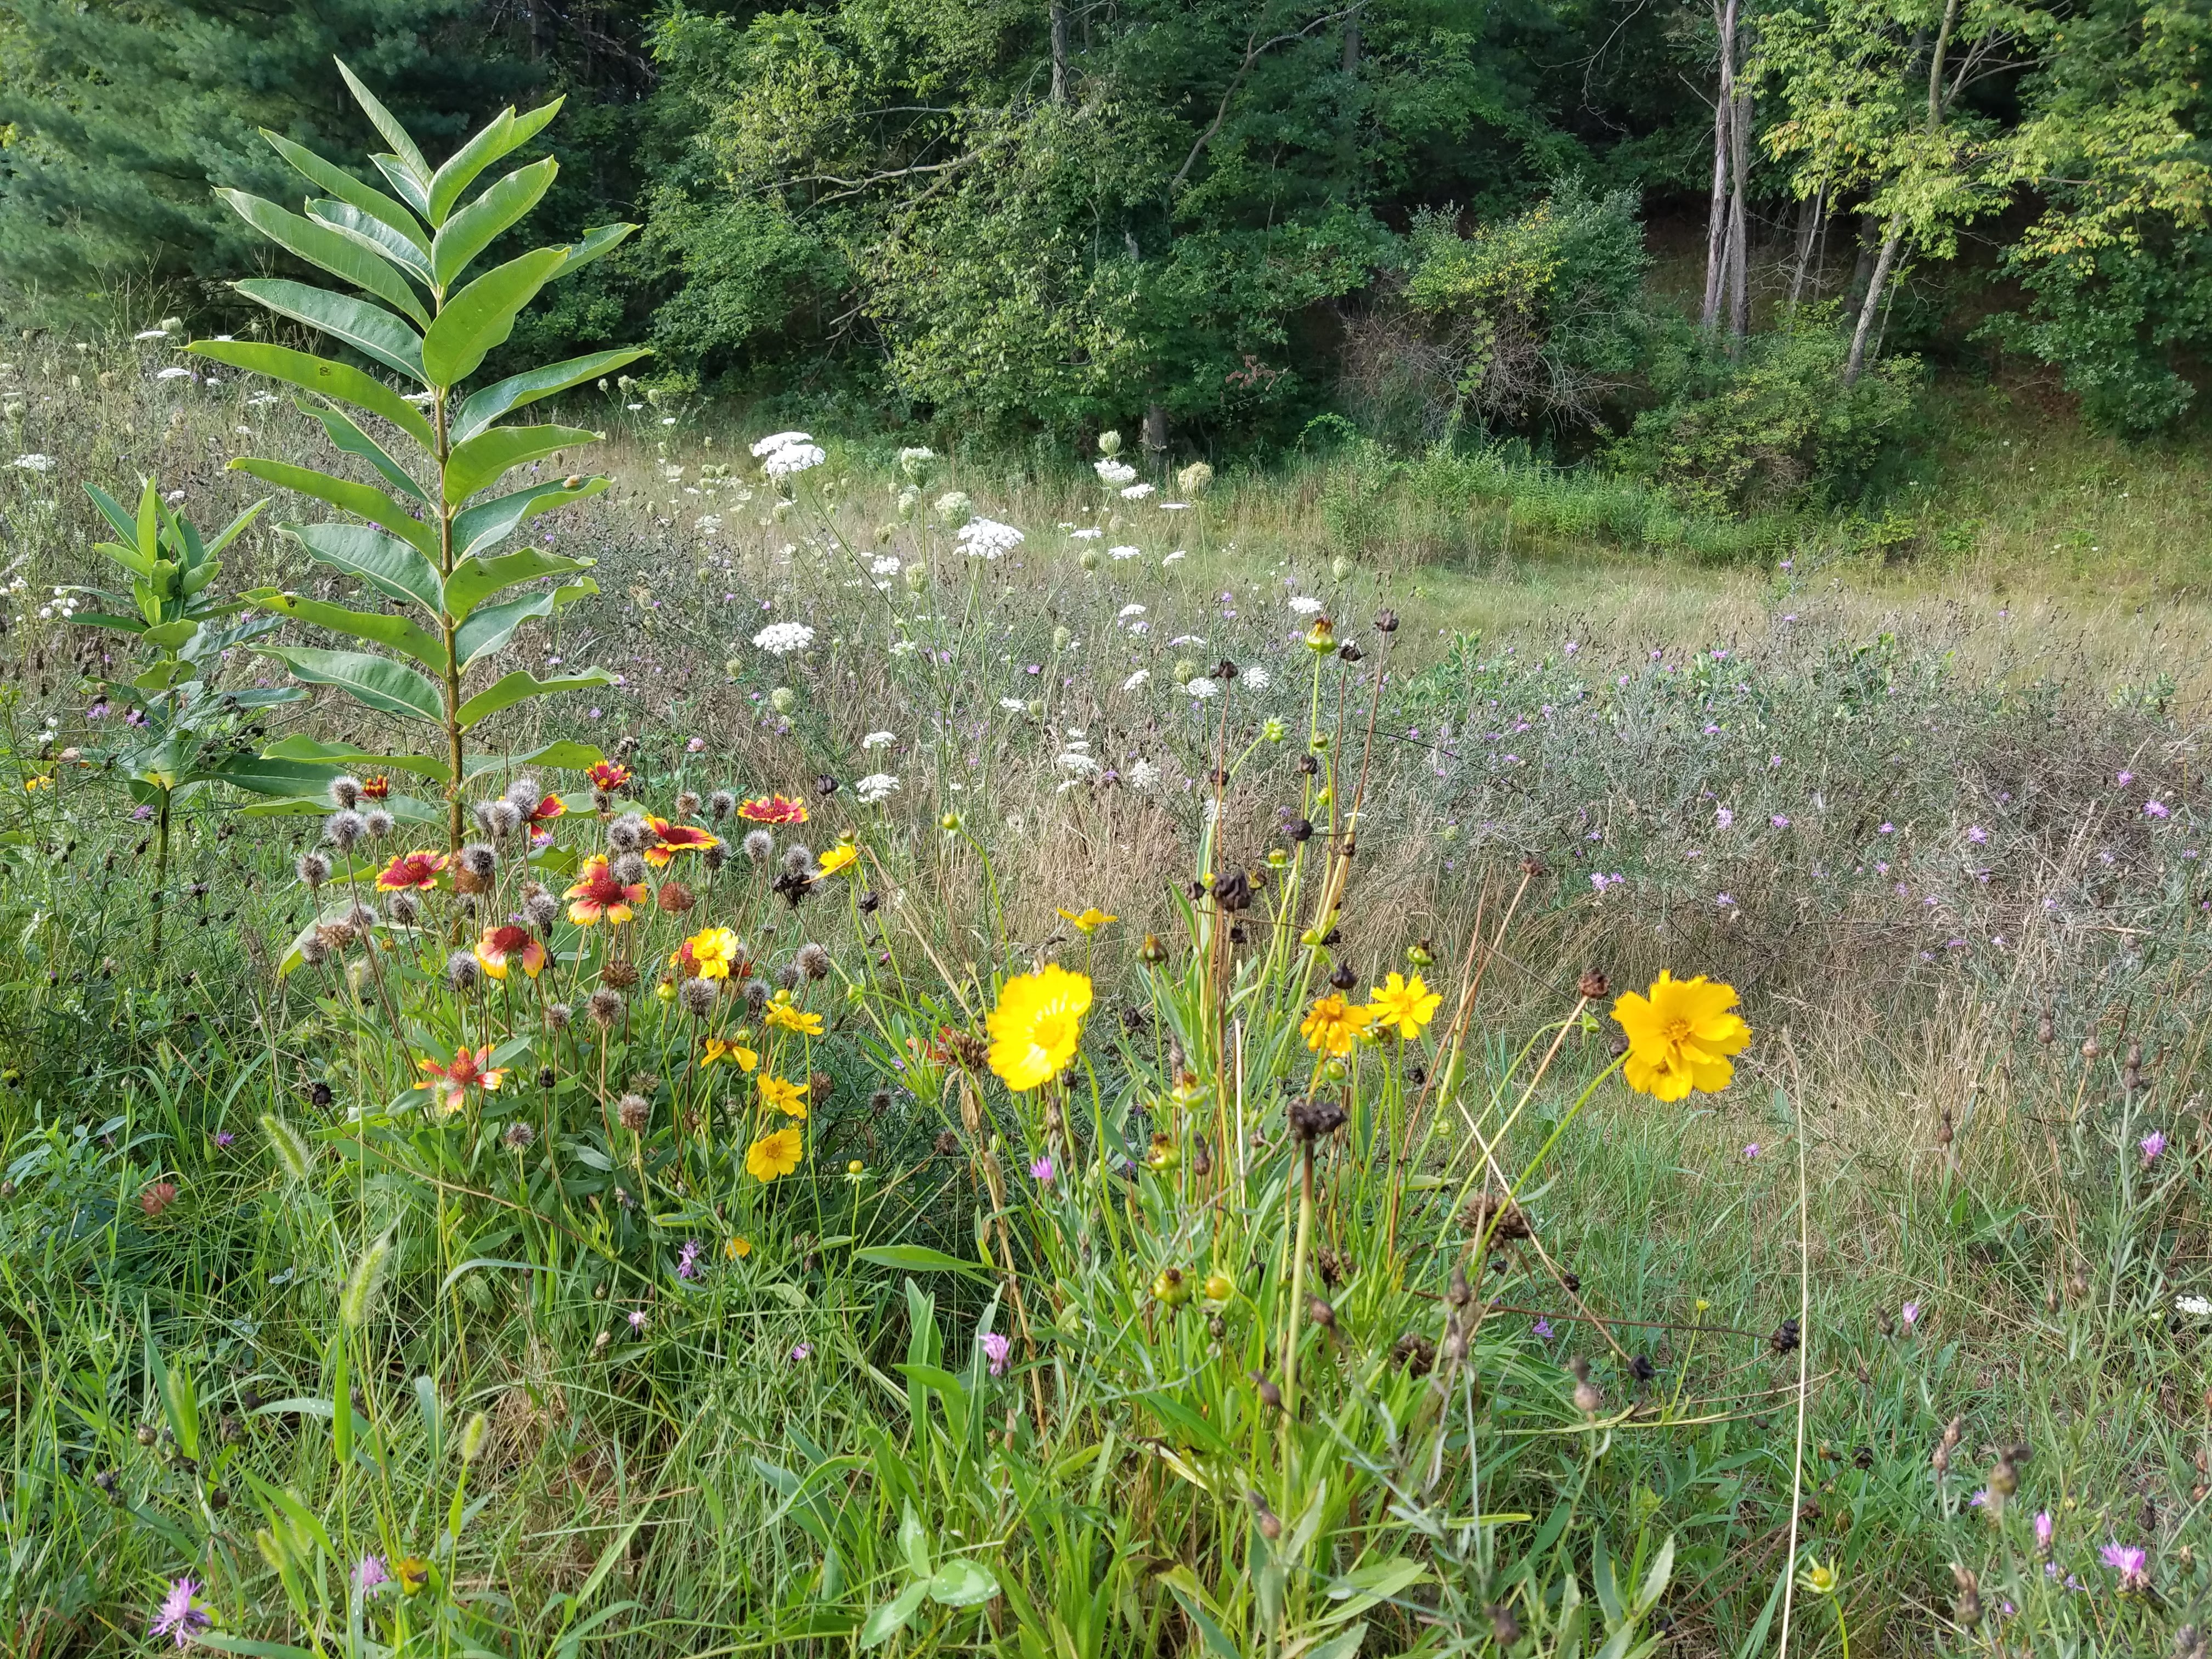
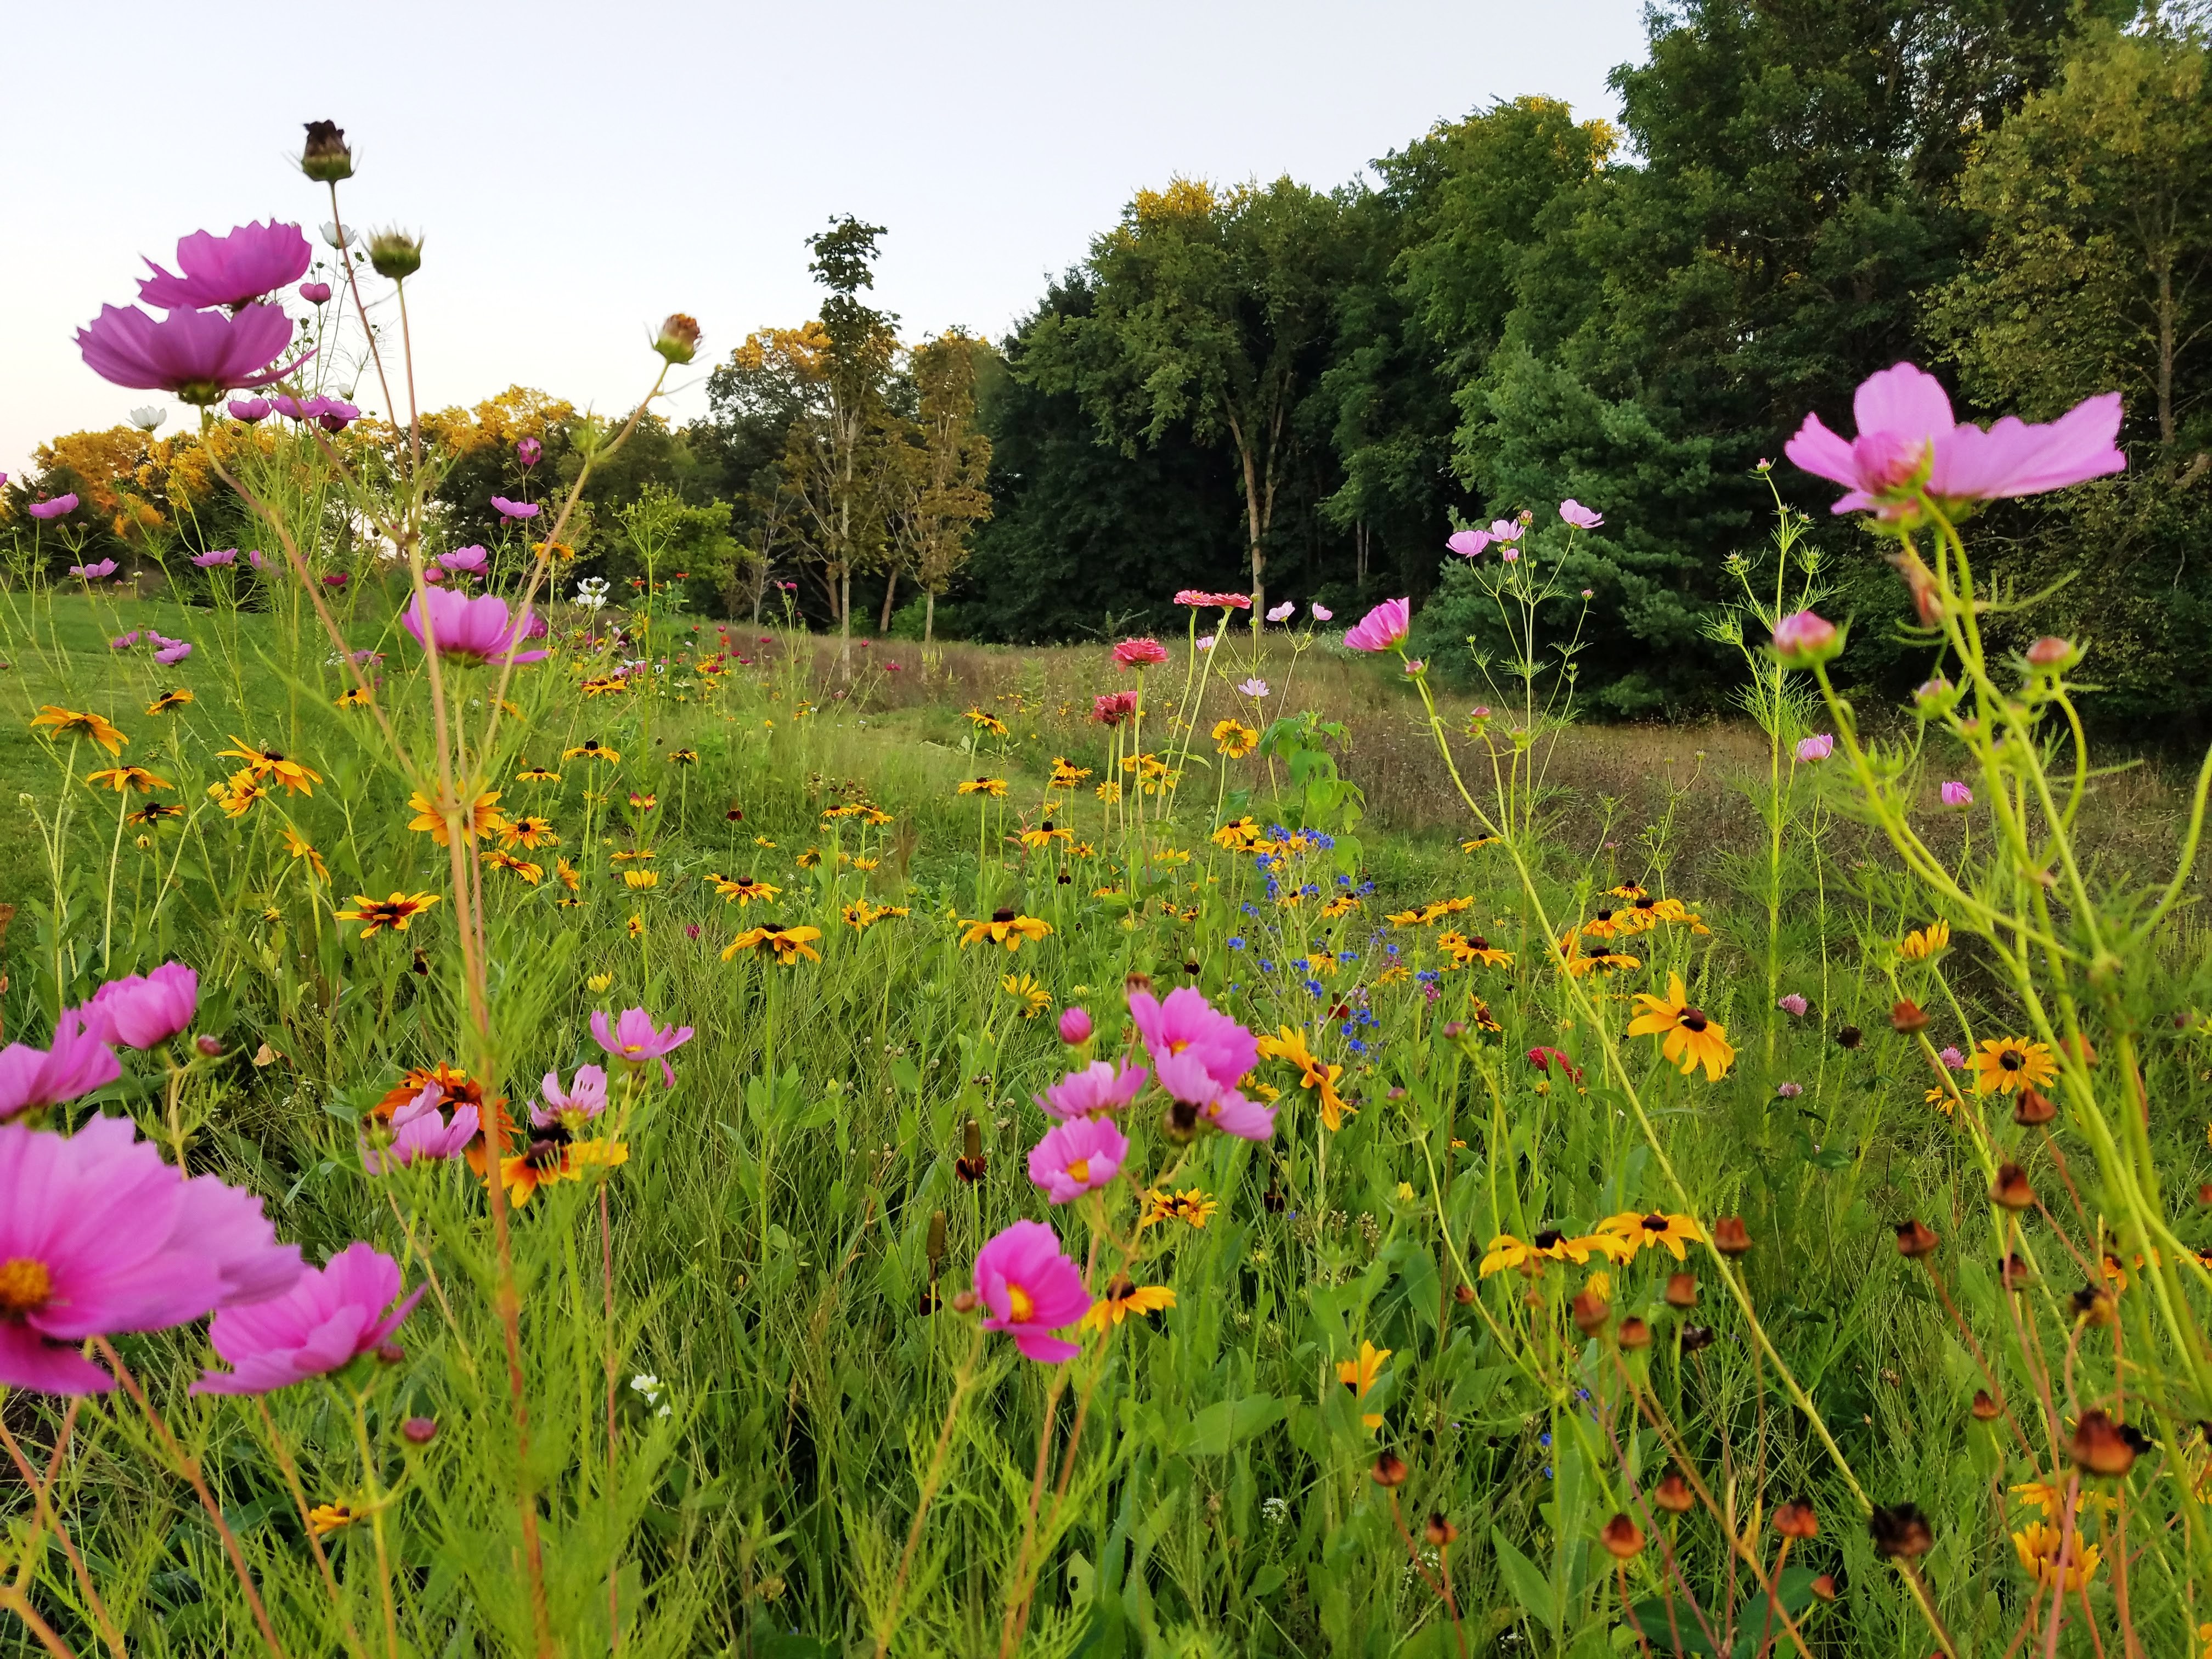
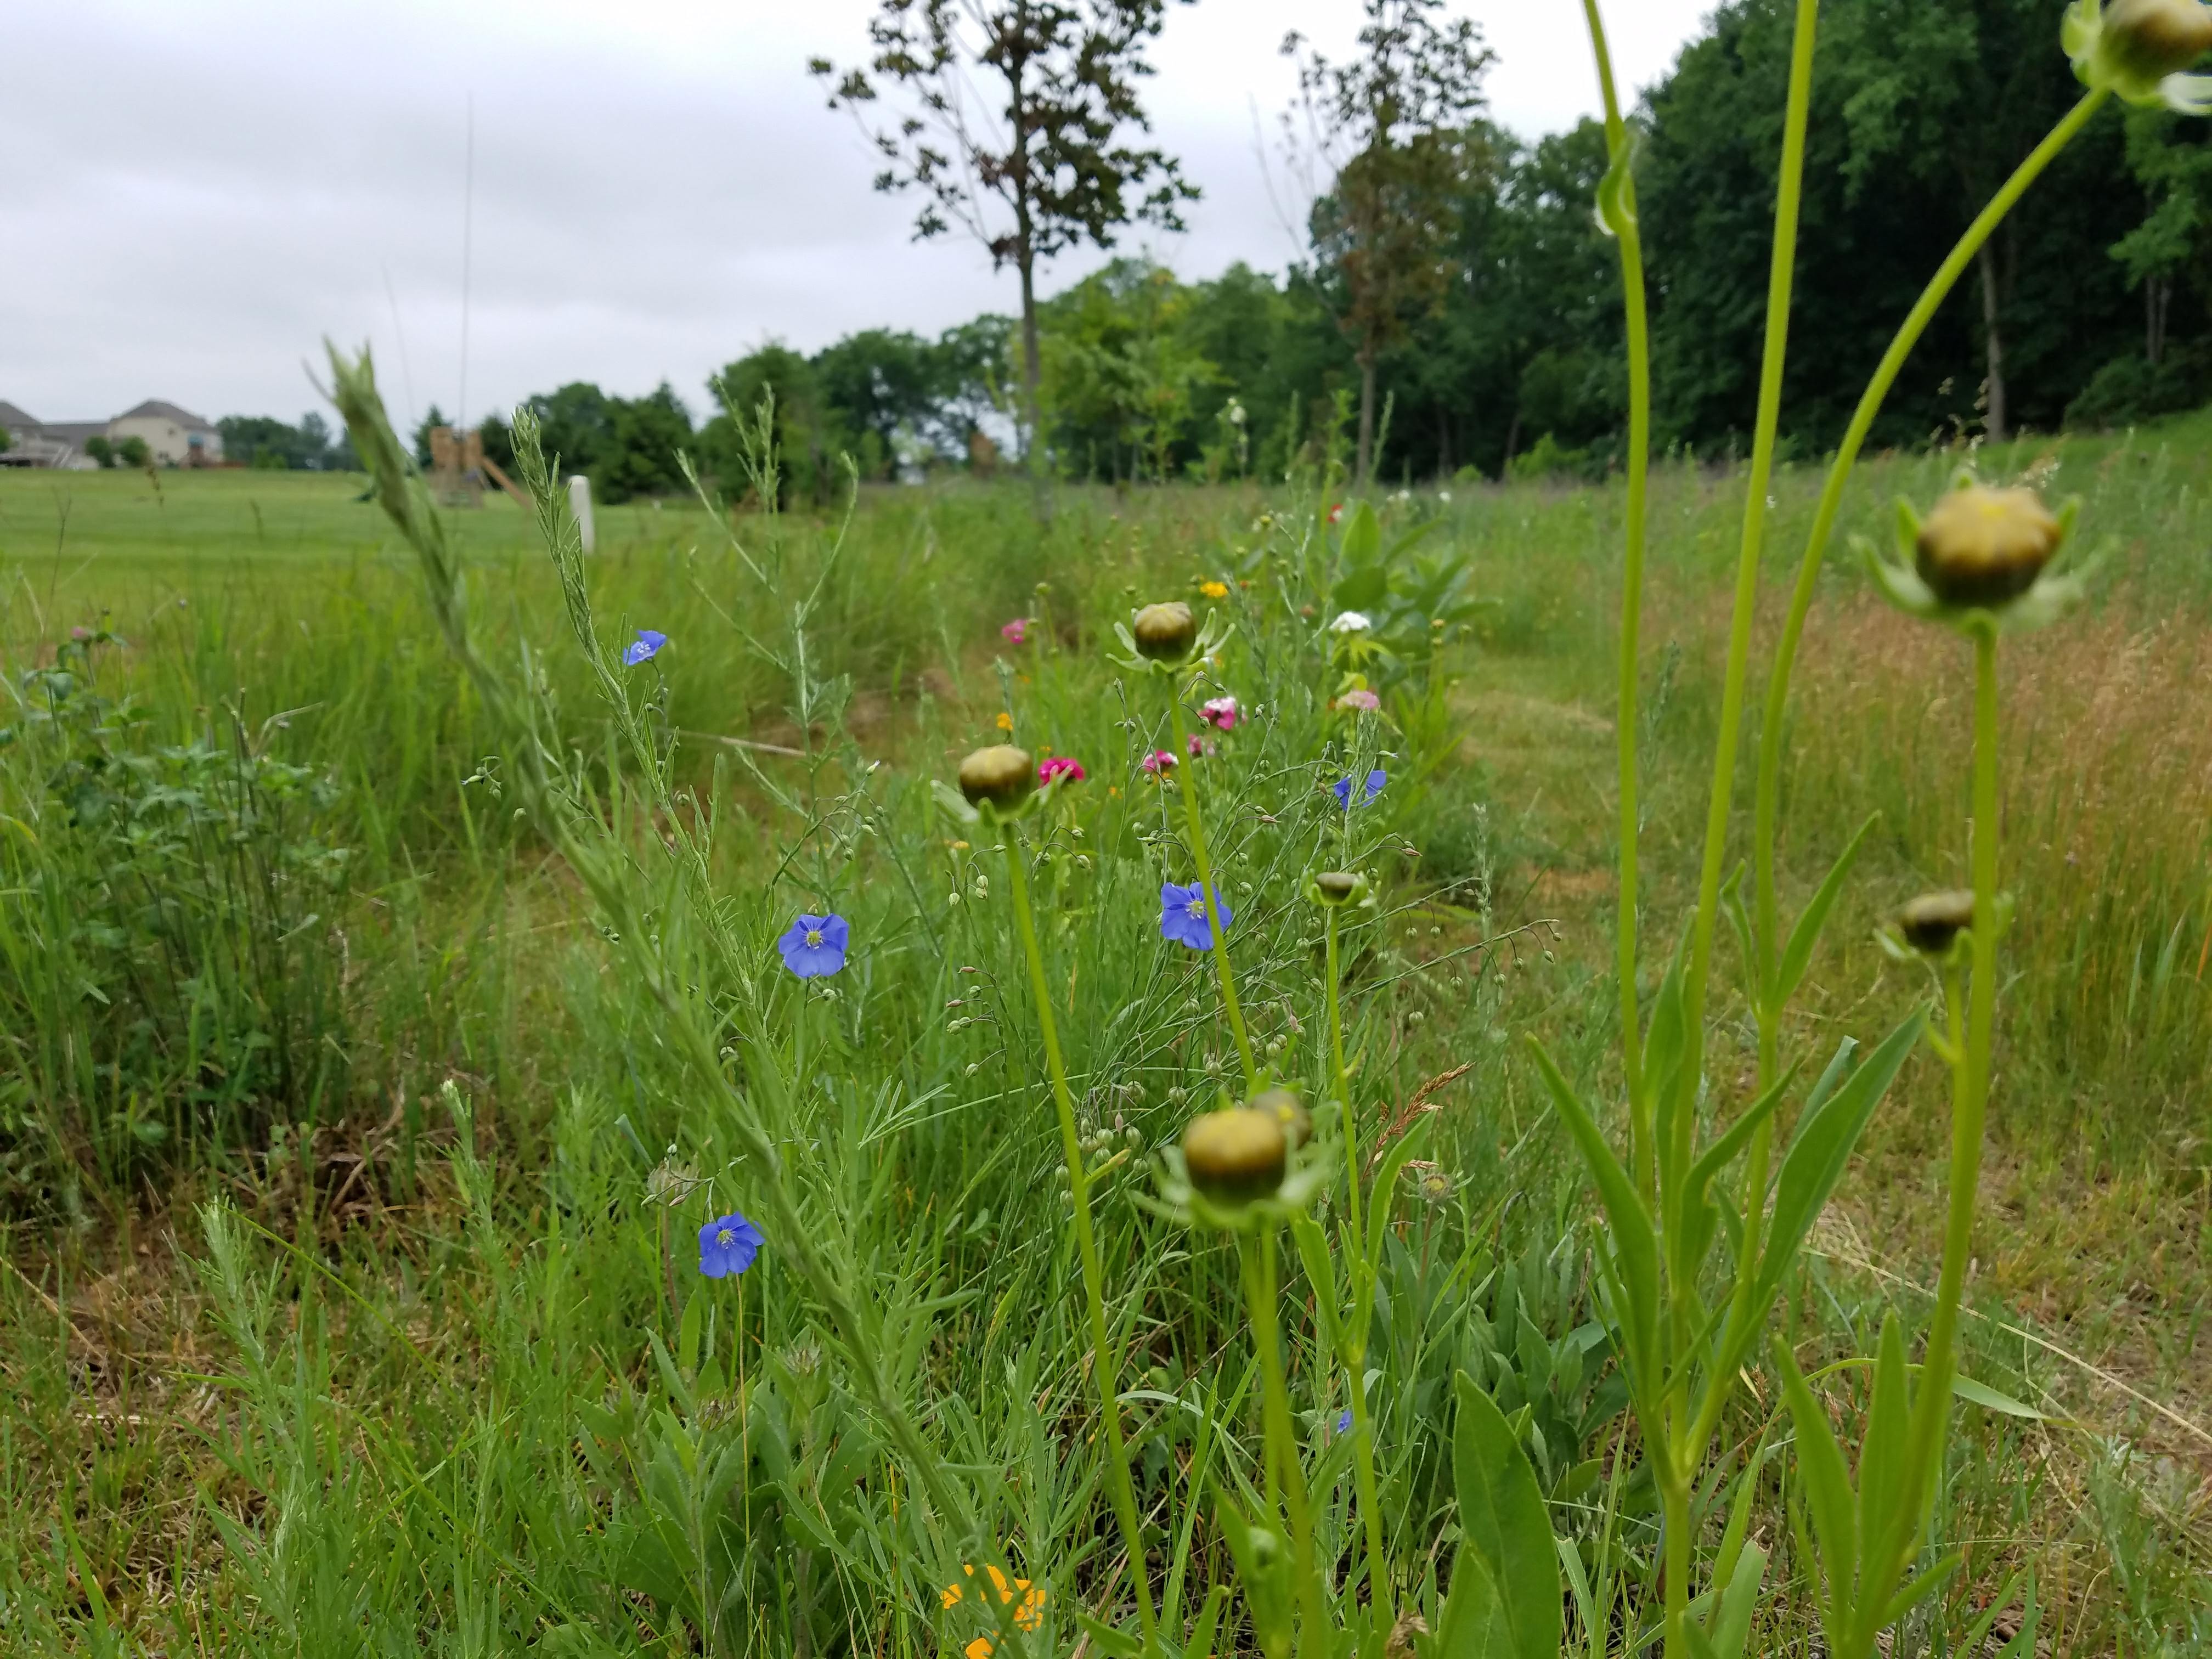
August brought a huge amount of color and full growth to these wildflowers. The work is finally starting to pay off! There are some truly stunning colors developing.
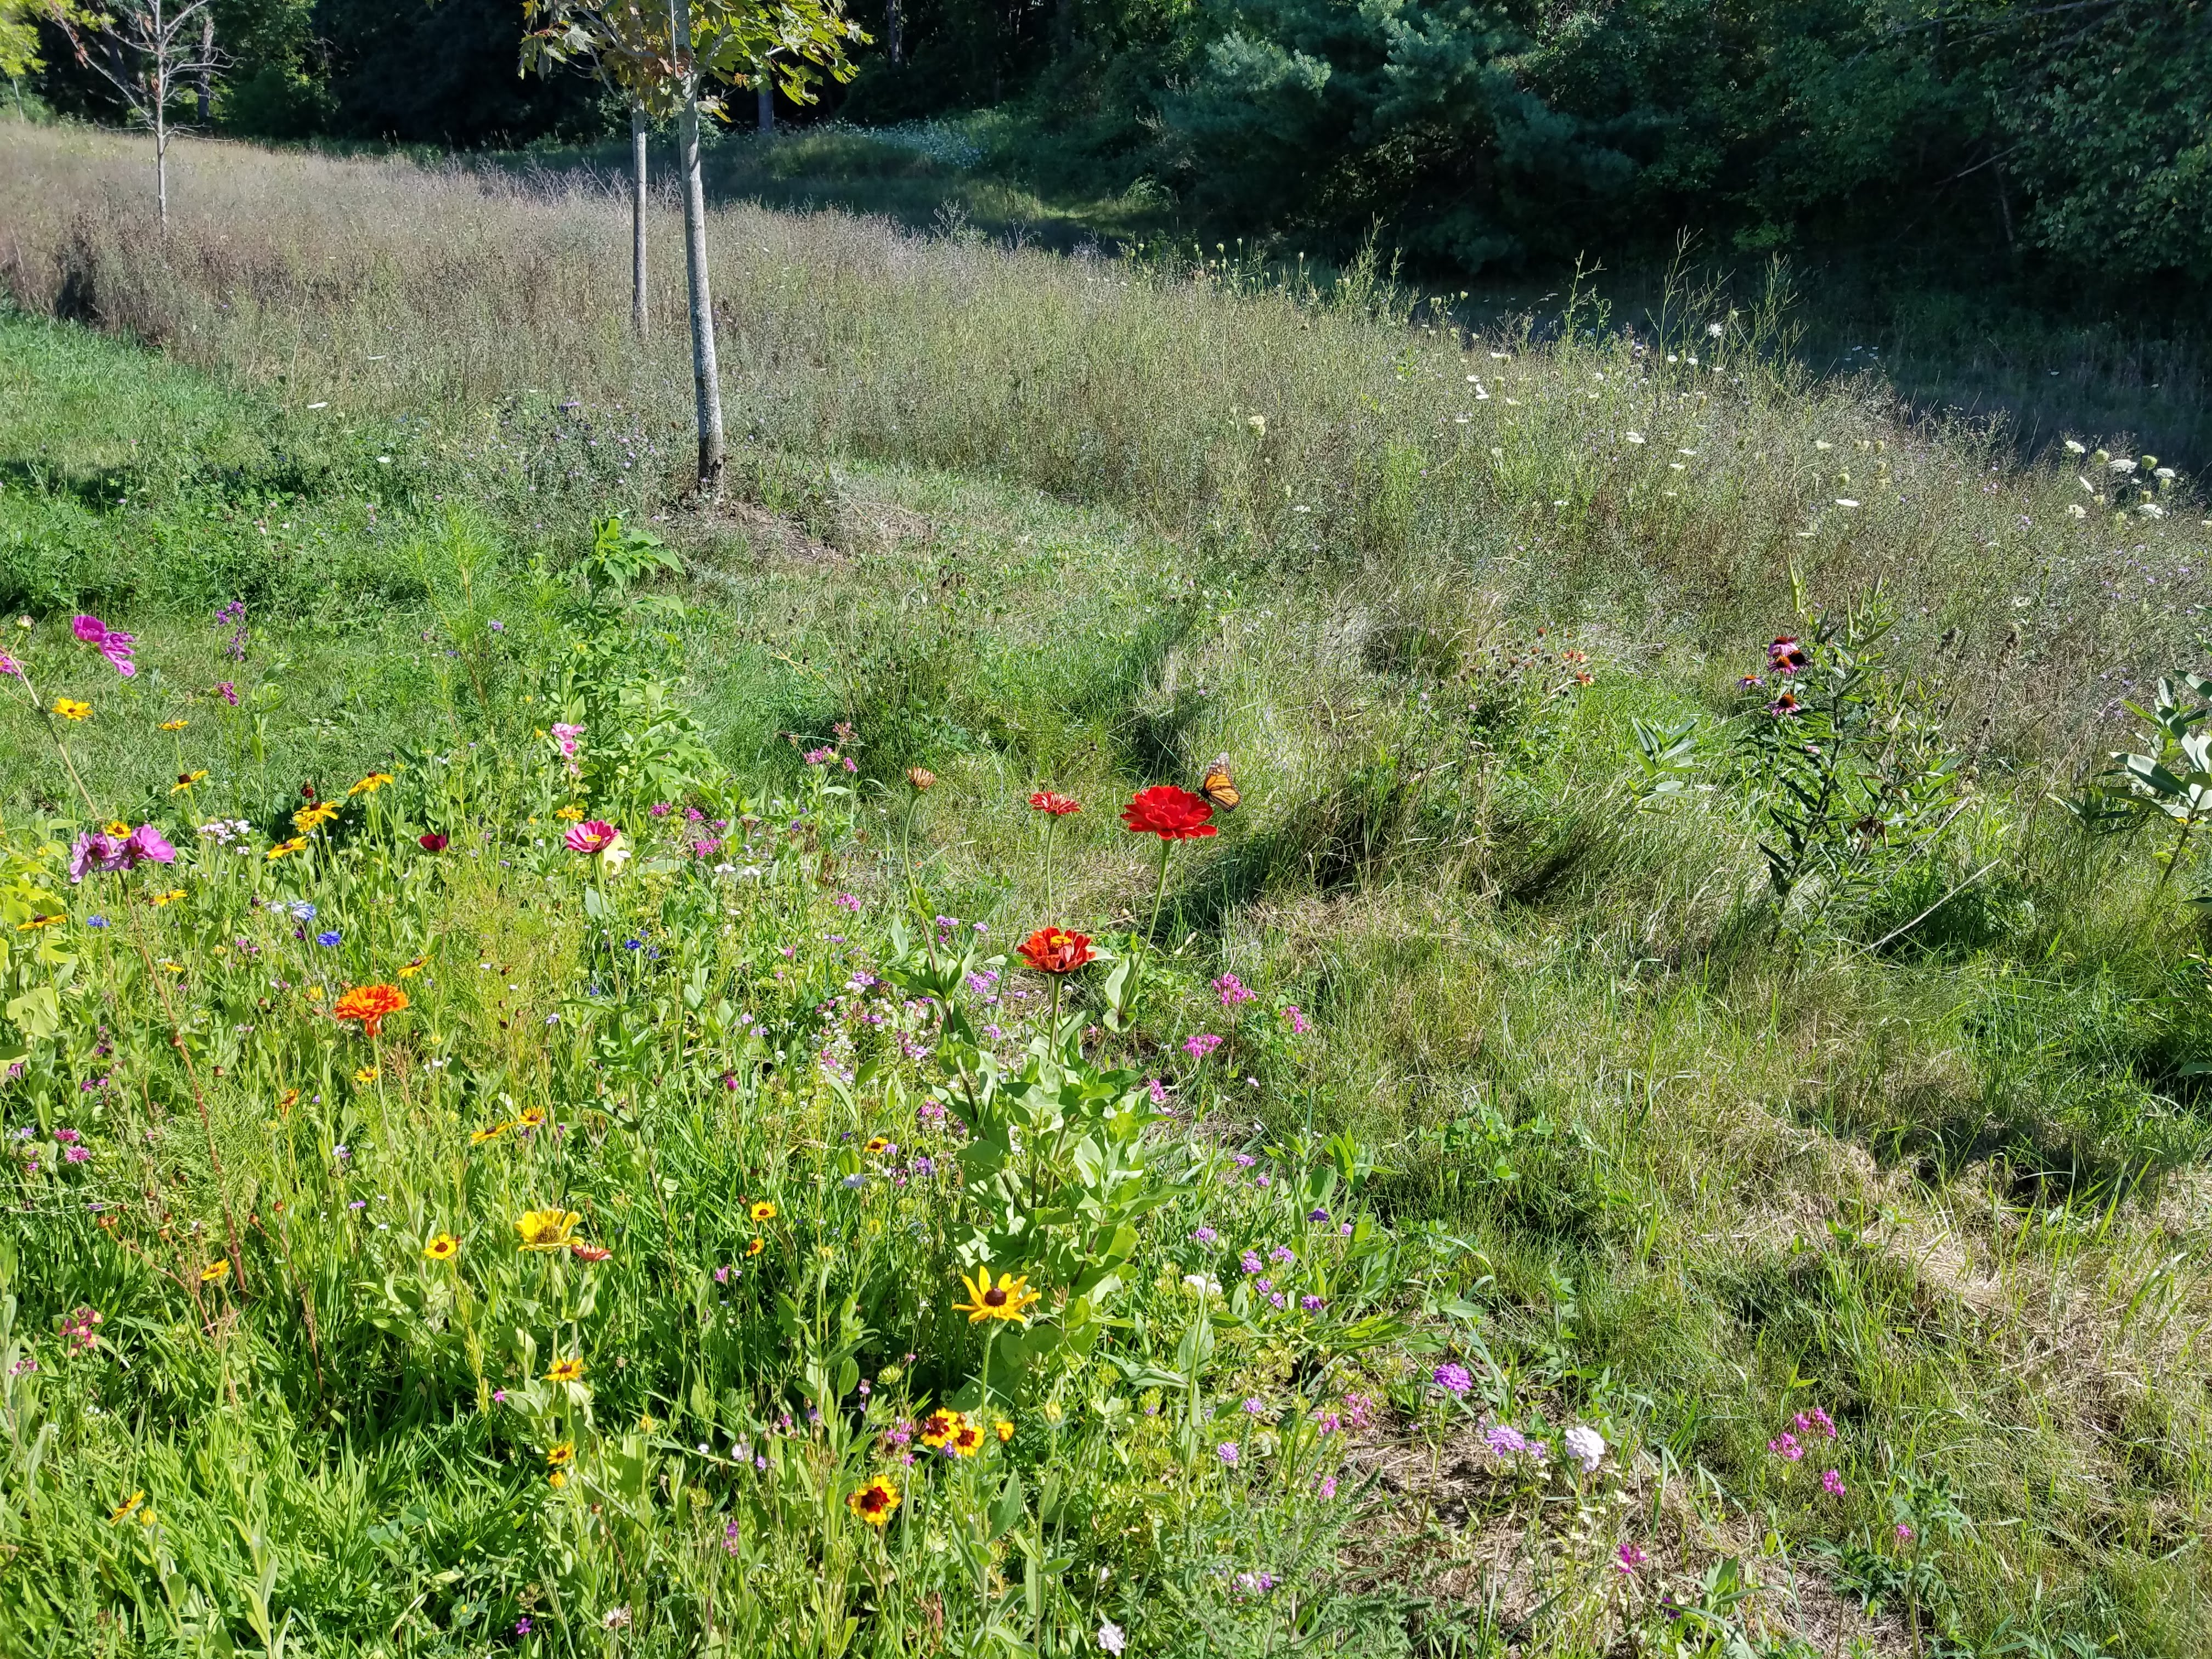
The Monarchs are loving all the wildflowers to choose from, especially these red zinnias.Wildflowers, Milkweed, and existing meadow in background
By the end of August, the Mexican Sunflowers and Cosmos were around 4 feet tall. It’s clear that the Black Eyed Susans are going to thrive in this area, and the Zinnias add a nice splash of color. Most of the small/short flowers are done blooming, and these taller species are taking over to put on quite a show.
By June 17, there were signs of life! Flowers had started sprouting, and by the large leaves it is clear that these are flowers and not grass.
Now the waiting game… Fast forward to July 10 & 14. It’s clear that a good stand of flowers are starting, but there’s very little color at this point:
It’s clear that there’s a lot of weeds coming up, too. I’m not sure if these were in the mix, or just existing in my soil. Either way, they’re there. I tried pulling some, but ended up damaging a few flower seedlings and realized I wasn’t going to be able to keep up, so I just gave up.
Finally, near the end of July, we start to see some real color and growth!I think this method of creating a wildflower meadow may work!
If you haven’t ever done much research on grass varieties, don’t worry: You’re normal.
Do you want the short answer on what is the “best” variety of grass for your lawn: Choose either bluegrass or perennial ryegrass. Keep in mind, this advice is for the upper midwest. Other regions of the country will vary.
Do you want the long answer? Great! then read on!
What makes a great lawn grass variety? I’ve spent a lot of time researching this, and I have come to some simple answers:
It should look good. Good is subjective, but for most of us that means it should have a uniform appearance with a deep green color.
It should feel good. Soft grass feels nicer than ‘pokey’ grass.
It should be tough and as low maintenance as possible.
Let’s look at a few varieties of grass:
Kentucky Bluegrass: You’ve all heard of it. This is the primary grass that sod farms grow. This grass has a fine texture and is very soft. This is the Cadillac of cool season grasses. It is among the best looking grass for a lawn, but can also be somewhat high maintenance to keep it looking the best. More water and fertilizer than some others.
Perennial Ryegrass: Really good alternative to Kentucky Bluegrass. Most “normal” people can’t tell the difference between them. A great bet for most normal lawns. Used on a lot of golf courses.
Improved Turf Type Tall Fescue: A pretty good alternative to Bluegrass and Perennial Ryegrass. Some benefits, some negatives. A little wider blades (sometimes a LOT wider) make this grass less soft feeling than others. Has some benefits for the high heat/low water summer months. May have some dandelion resistance?
Kentucky 31 Tall Fescue: Not a good grass for lawns (IMHO). Too rough of a texture. Doesn’t feel soft. Main benefit: it’s cheap to buy the seed.
Fine Fescue: Great for shade. VERY fine texture. Some of the softest grass you can find. Slower growing than some others.
Clover: many people don’t like this in their lawn because it ruins the uniform “carpet” look, but it has many benefits. Adds nitrogen to the soil.
Finally, after saving these blue wine bottles for over 8 years we made and installed them!! They are so eye catching during the day and even better at night!
This is how we made them: From Home Depot we bought galvanized ceiling plate and zinc threaded rod and copper spray paint.
Sunset June 2018
First Flame!
Evening Glow
After painting them installed the wicks and added the tiki oil and screwed them onto the support posts of the deck to light up the patio area and to keep the bugs away. So far so good!
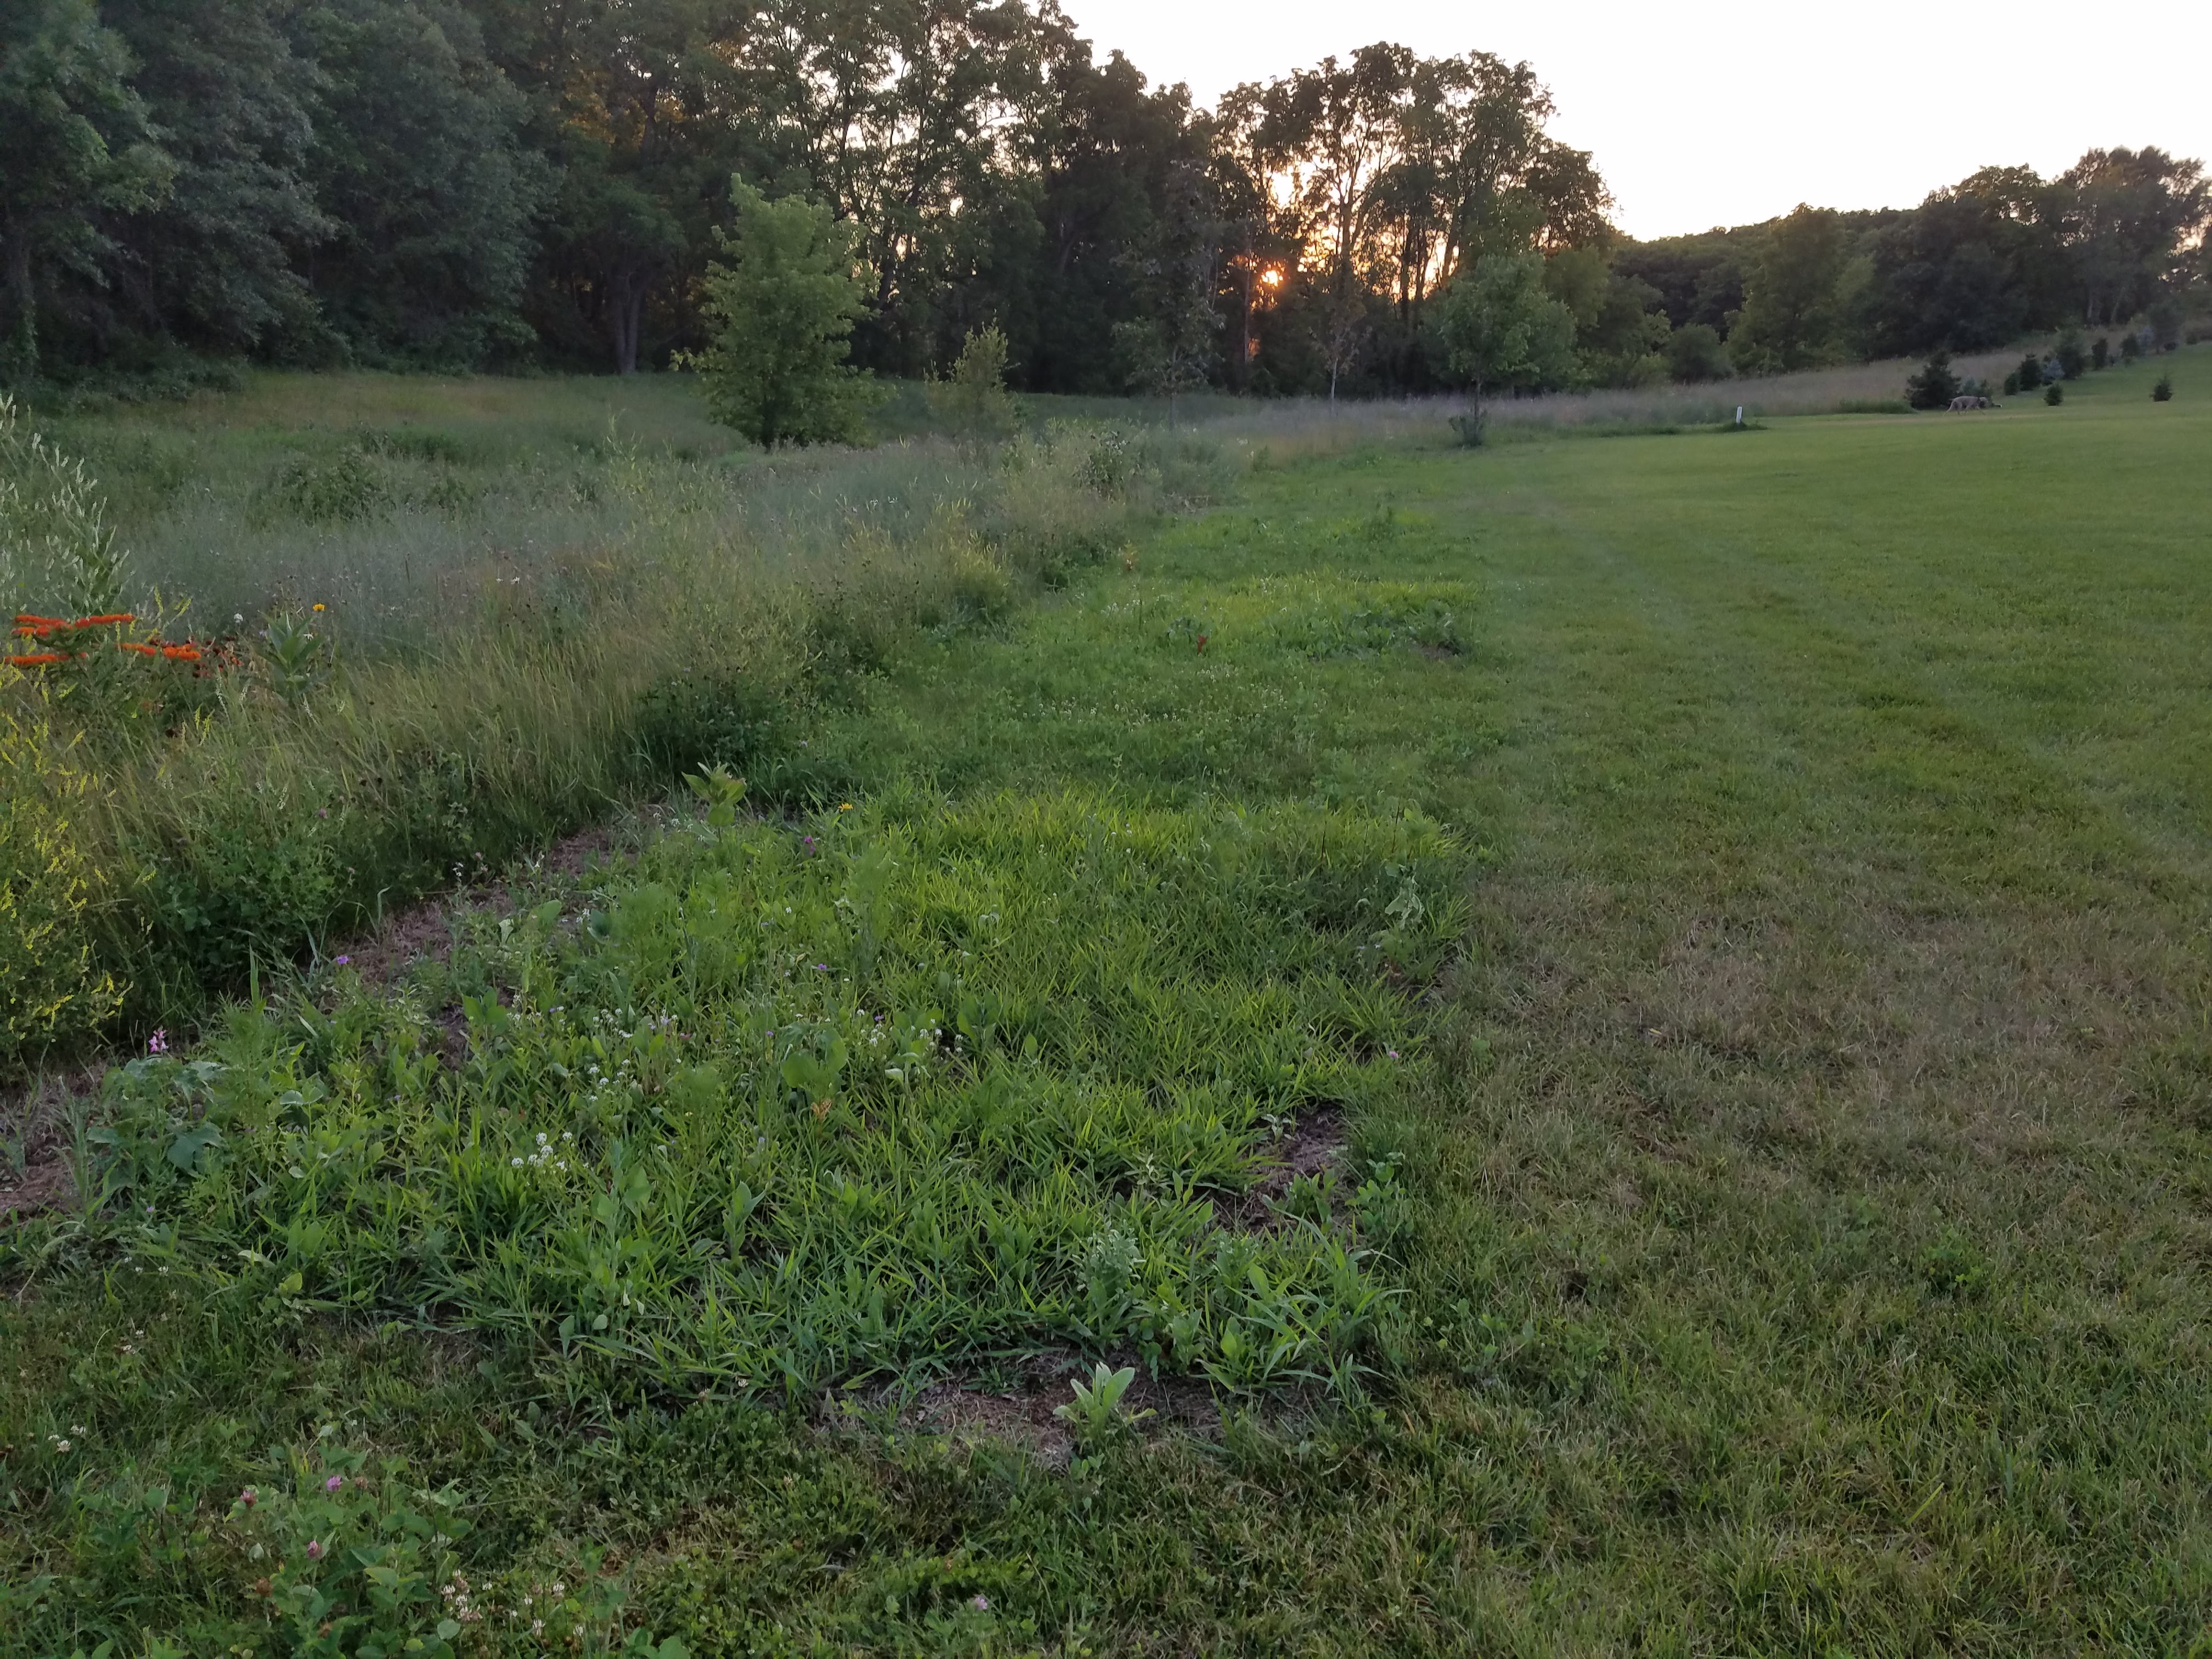
We had an existing grassland meadow behind the house that we wanted to convert to a wildflower meadow. I’m trying 2 ways to get flowers established. 1 – Mow down the grass, turn the ground over with a shovel, and transplant an existing flower and 2) Kill a large area of grass (approximately 10’x10′) with Roundup and then plant seeds. In either case, the grass is firmly established and wants to out-compete the flowers, so this will be challenging.
These first couple pictures are June 2016, where I transplanted some seeds I started indoors earlier in the spring. I cleared small spots with the weedeater, then turned the ground with a shovel, and planted the flowers. They seemed to take off OK, but not spectacularly.
Clearing and planting small areas
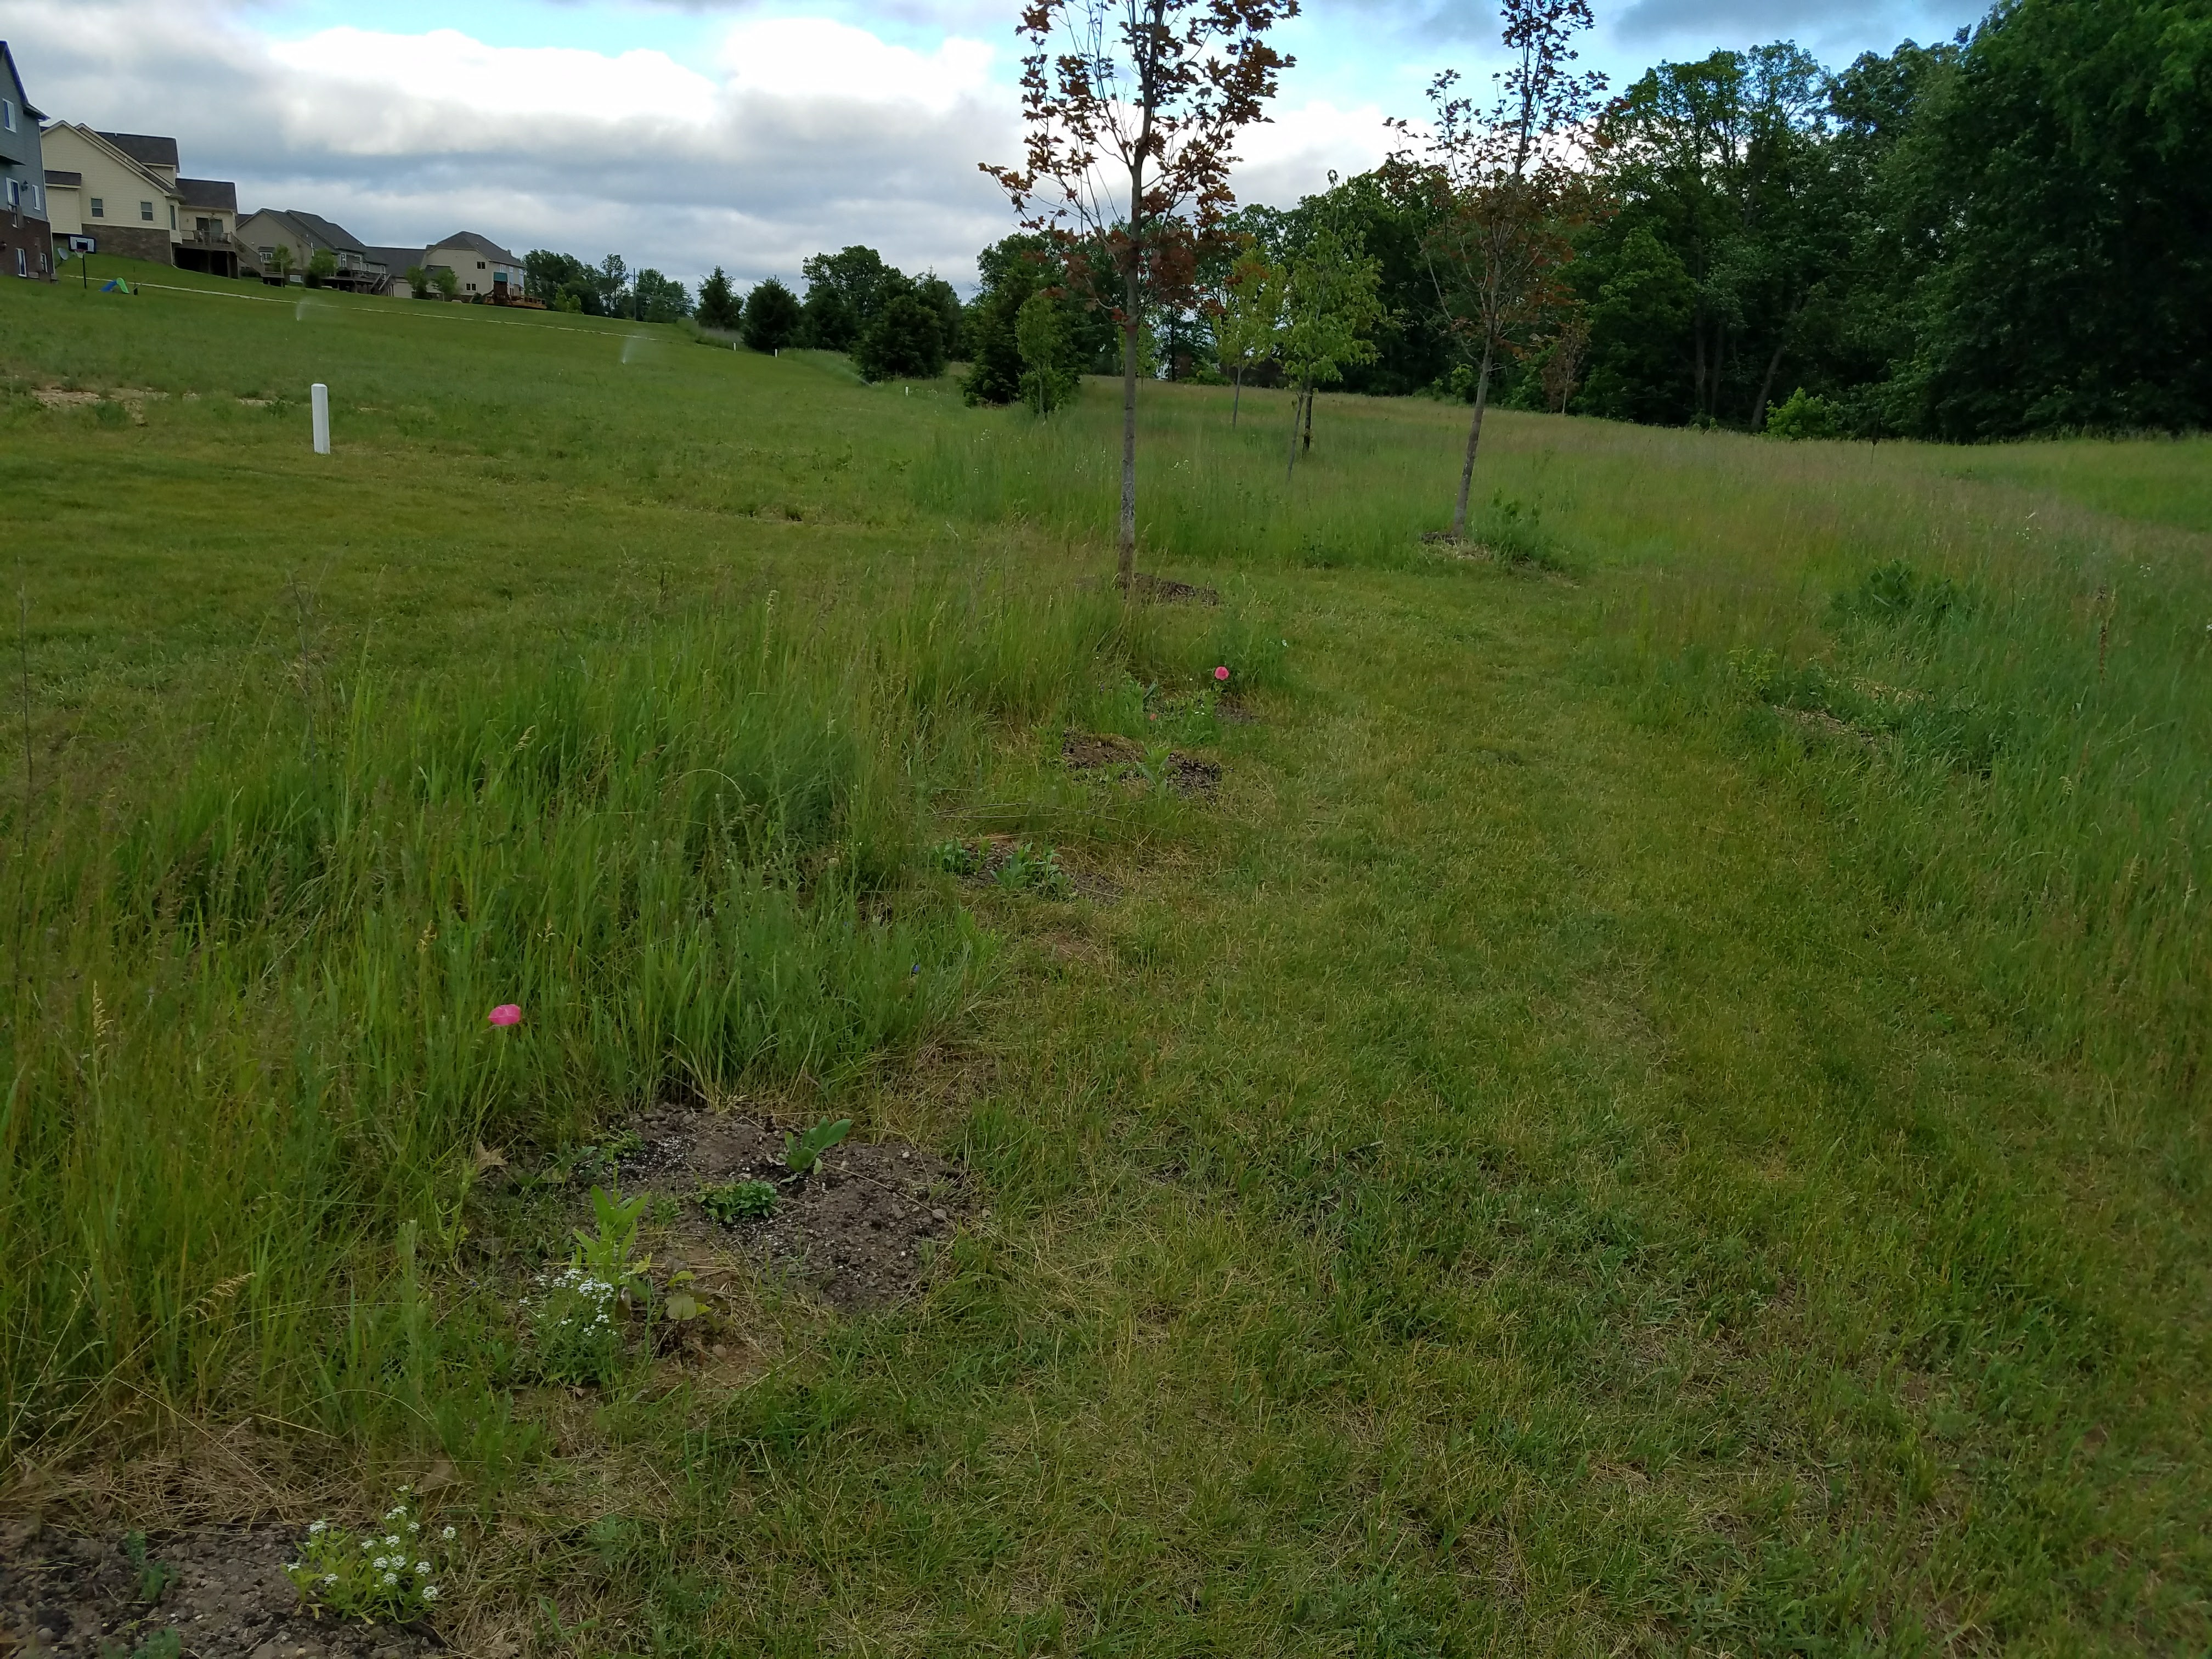
Here’s a look at how these returned in 2017. Some came back, others look like they were annuals and didn’t re-seed.
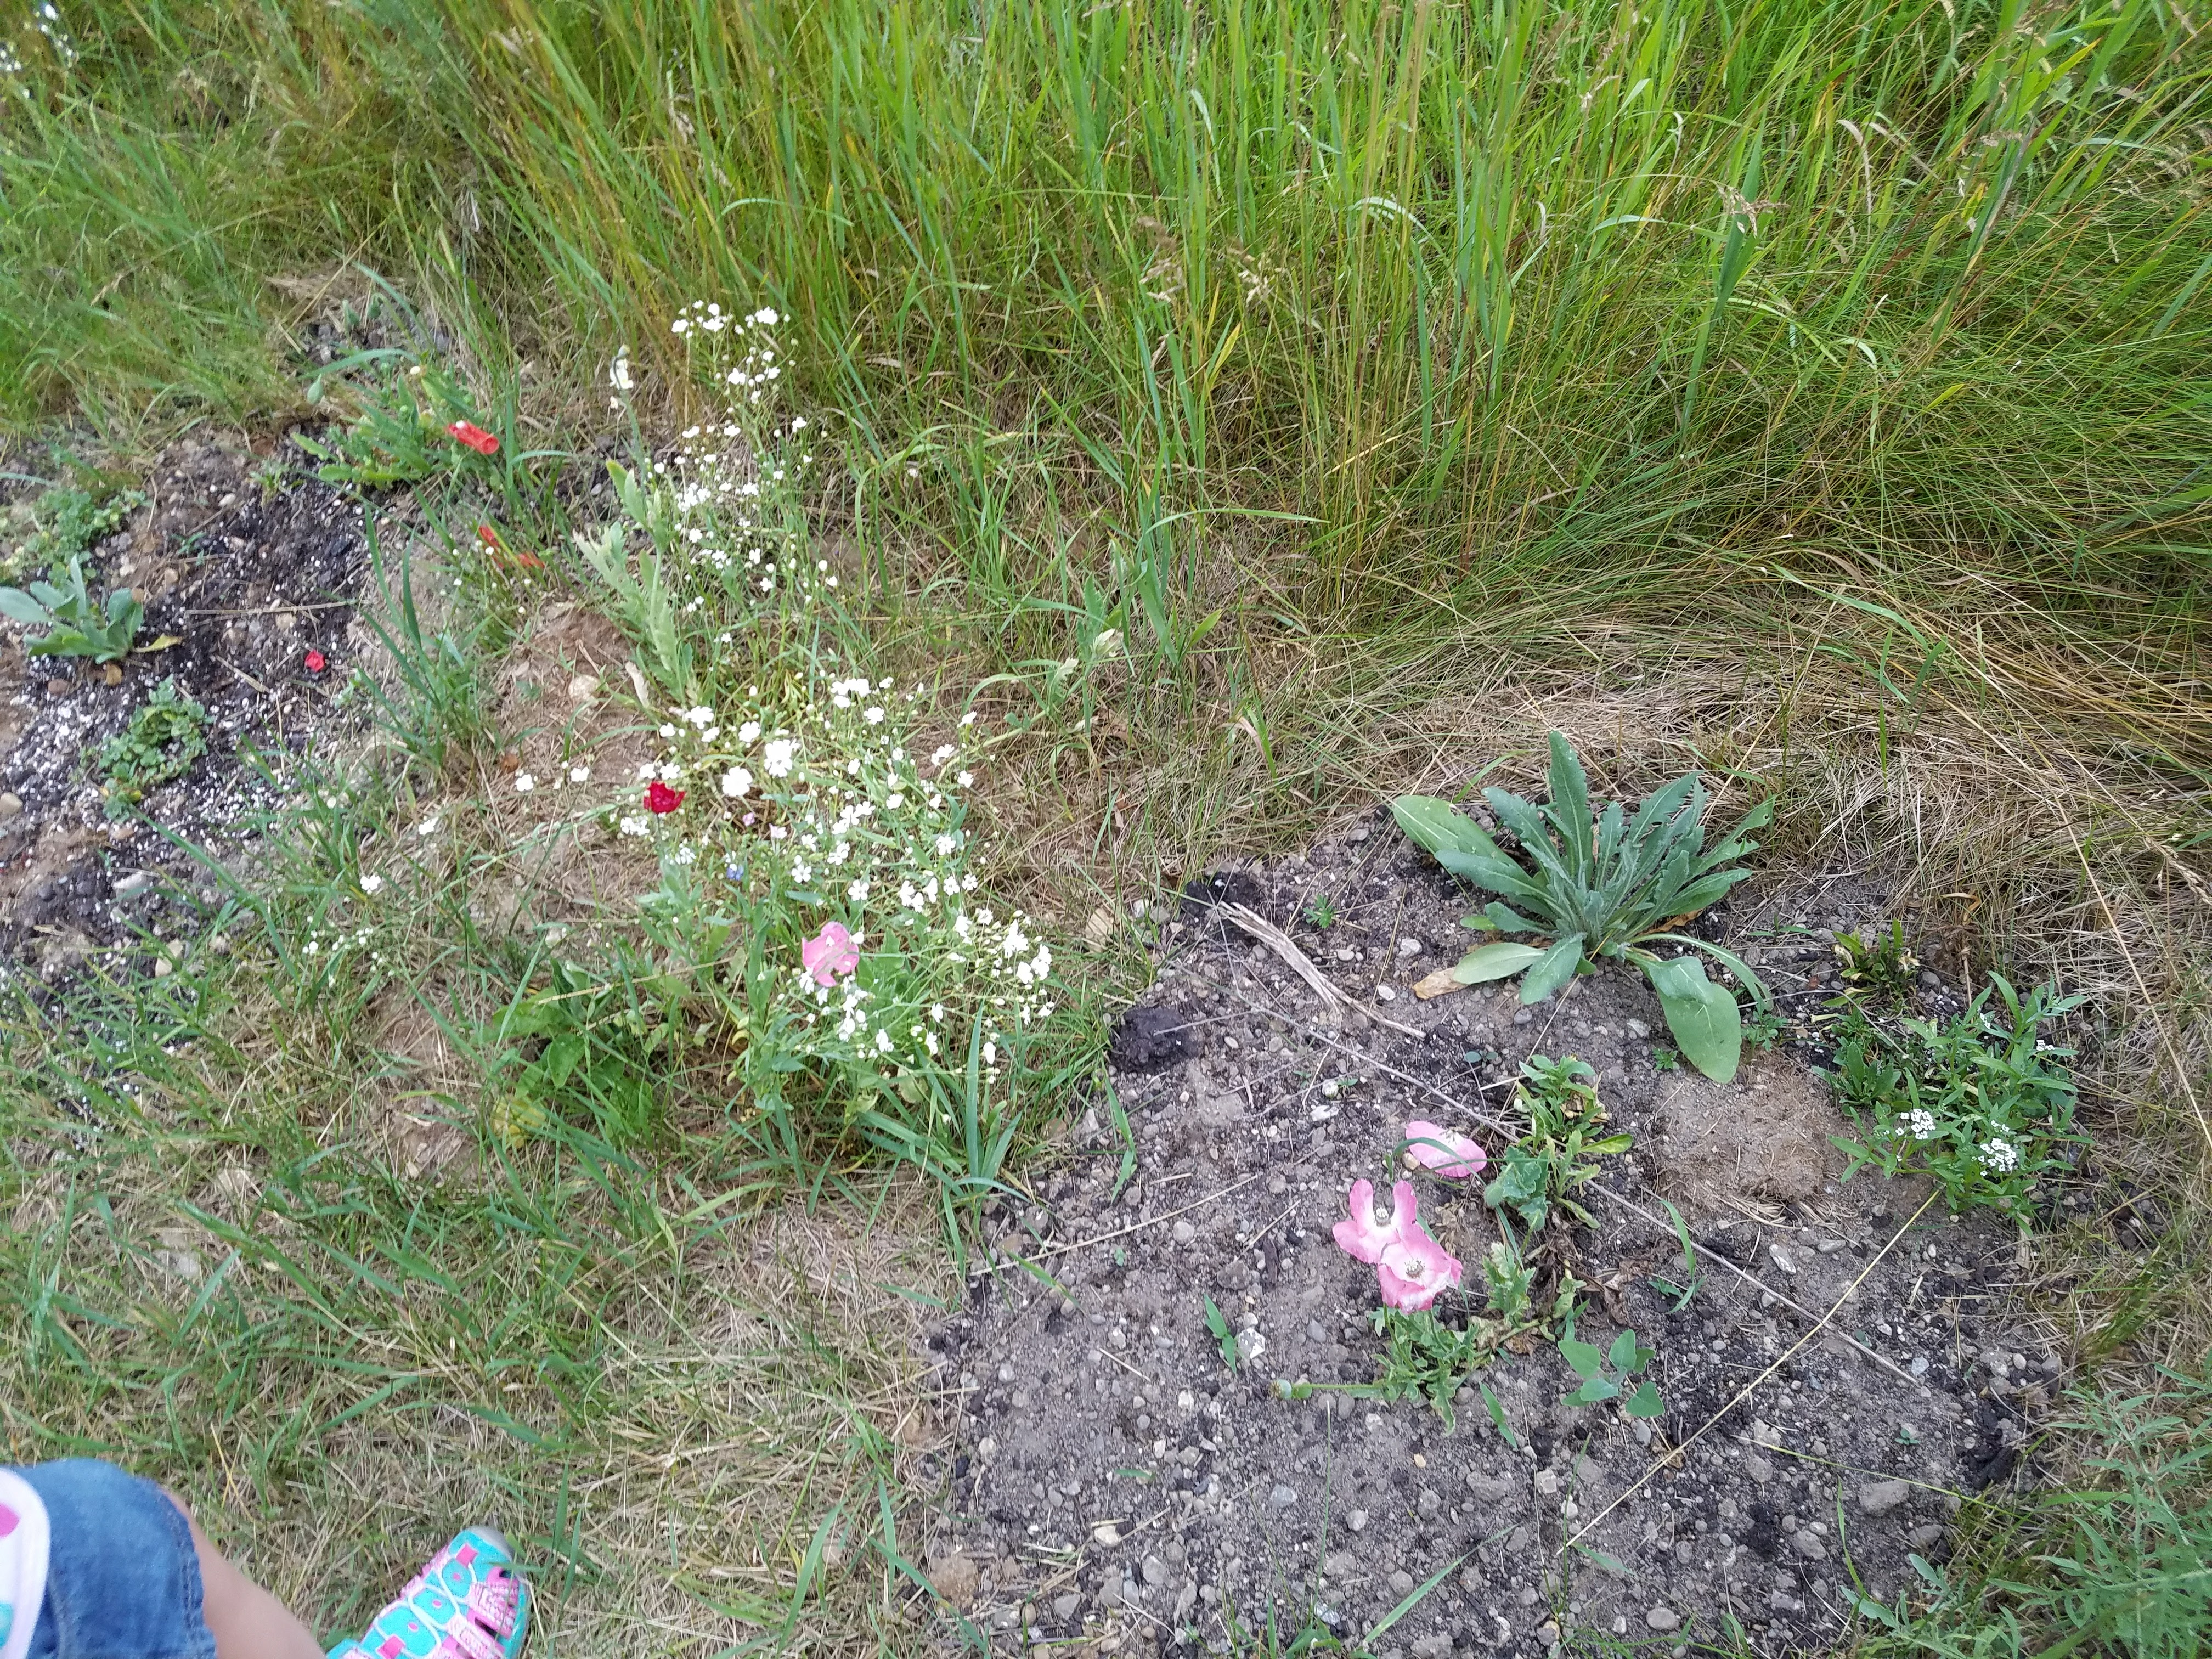
The next attempt was in June 2017, where I cleared some areas with roundup:
Areas cleared with roundup for wildflower planting
I let the areas die for about a week, then roughed up the ground a bit with a garden rake. I then hand broadcast some wildflower seed into these areas. I used about 1/2 pound of a seed mix. I think it may have been a bit heavy, but I’m hoping to get a thick flower stand to help it compete with the grasses. I’ll post more photos of these areas through the summer.